Cat Trick Training ~ Kitty Agility ~ Kitten Manners Training! YES! All Possible!
Feline Tricks and Cat Agility as well as DIY FREE Cat Crafts and Patterns ~ Toys, Hammocks, Sweaters, Beds and MORE!
Ideas For FREE and CHEAP Cat Trick Props and Agility Equipment ~ keep scrolling downward
Regulation Sizes for Cat Agility Equipment as well as Ideas and Information For Building Your Own
Photos and Information on X-Inactivation Mosaicism ~ Split Face Color Cats ~ Bi Eyed Kittens
If it is Cat Training Information YOU Are Looking For, also to see our cute photos...scroll on down
CATS!
One of the VERY few animals I could not have as a child, is the one type Deron could.
Cats.
As a child, a young child, I had, and that was ME, myself, I had MANY animals, many types of animals. But my parents did NOT like cats. My mom, well, she did not like animals. My dad did not like cats because he so enjoyed wild birds. He made many and hung many different types of Bird Houses around our home and property.
However, when I was 13 y/o I brought home a kitten for my barn. I had a pony and then a horse growing up. At 16 I brought home a kitten for my bedroom downstairs.....amazingly, my parents let me keep it.
Deron parents on the other hand. Deron could not have ANY animal until one day...they brought home two kittens from Deron's Grandparent's Farm. Smokey and Glacier. Deron was 13 years old.
Through the years I have always had a cat since the first one. And when my sons were very young we bought them kittens to learn to care for too. My middle son still owns and loves cats (and dogs).
I think the "you either love them or hate them" certainly applies to how most people feel about cats. I find that funny....in an odd way.
DID YOU KNOW YOU CAN TRAIN CATS?
When I was a kid we had these wonderful neighbors. I always loved animals and especially Horses! The father of the home Shod the St. Louis Budweiser Clydesdales! The mother had a trained black cat. I remember Nancy as a very loving person. She was so kind to everyone and she loved animals. She loved to show off her cat doing little tricks...and I LOVED it when she did! Her cat was the FIRST I ever saw actually do something other than lay in a window.
Cats are FAR different from Dogs. You do not train cats the same way you would train a dog.
There are things about cats you NEED TO KNOW before training them.
First and Foremost! DON'T LET PEOPLE TELL YOU THAT YOU CAN NOT TRAIN A CAT TO DO THINGS THAT OTHER PETS CAN DO. If you believe the cat can not do something it won't. If you however believe that your cat can and will learn, it will. It might take 4 months to teach your cat to do something... BUT IT WILL LEARN IF YOU BELIEVE AND SPEND THE TIME IT TAKES TO TRAIN IT!
THE NUMBER ONE REASON A PERSON WILL TELL YOU THAT CATS CAN NOT BE TRAINED OR TAUGHT, IS THAT THAT PERSON EITHER BELIEVED SOMEONE ELSE WHEN THEY WERE TOLD THAT, OR THAT PERSON GAVE UP ON TRAINING A CAT BECAUSE IT TAKES TIME AND PATIENCE!
When I was a young kid I had a Friend named Gail. She has a kitten, raised it, named Falstaff. Gail did NOT KNOW you could not train a cat and therefor had an incredible trained cat! Falstaff came when called, walked on a leash, fetched, and did a few other tricks. (I don't think Gail knew Nancy and or about her cat).
YOU must be patient and consistent when training ANY animal. With Cats. More so times 50. Cats seem to know that if they act like they do not understand or if they act like they do not like something, most people will give up and go away.... YOU have to train your cat that you are not going to give up and there are good treats involved if they do the task.
KNOW THIS: No matter what. If you own a cat, kitten, whether you know it or not, you ARE training them through your actions. Your cat is learning that either YOU are in charge, or if THEY are in charge. A cat will test their theory of who is the boss often, if you laugh and let things go, that is when they misbehave, your cat has learned that IT is the boss. Why not take a bit of time and train your cat 'for good and not evil'?
A Tiny Bit About Us and Our Animal Training
Deron and I have trained ALL SORTS (species) of animals. We met when we were both racing Sled Dogs.
Here are a couple of photos of us training llamas. Someone gave us 14 llamas and we trained MOST of them to Pack and Pull. I made the equipment you see them wearing. I also taught a couple of our llamas to do some simple tricks.
We have trained animals to do about every task they are able to do. I have trained animals to do tricks since I was 6 years old and I started with a Chicken hen.
Deron and I have had our animals, our Trick Troupes, performing at Schools, Churches, Old Folks Homes, Pet Stores, Wolf Sanctuaries, Scout Meetings, VBS Events, Talent Shows, and more. Deron and I have been featured with our animals on Television several times thorough out the years.
As I say on each of our websites, I like to train animals, our pets to do an Agility Course. It is wonderful training, the animals love it, it is great bonding training, it gives animals a 'job', and that stops bad behavior, and each animal is just so cute when they learn it all. We have taught species from Mice to Horses and including fish...so far.
Deron makes our Agility Equipment. He 'does the math' so that the equipment our animals use is the right size and stable for each.
Ok, for those that think others are responsible for them no matter what THEY do wrong. WE ARE WRITING WHAT HAS WORKED FOR US WHEN TRAINING OUR OWN ANIMALS. YOU ALONE ARE RESPONSIBLE FOR YOUR OWN HEALTH AND SAFETY AND THE HEALTH AND SAFETY OF YOUR OWN ANIMALS!
Cats can and sometimes do scratch and bite. YOU are the cat's owner and trainer and should know how to handle YOU OWN cats.
Use Care When Training and Know.... the information we are giving you below has worked for us over many years. It may or may not work for you. YOU DECIDE. YOU ARE RESPONSIBLE FOR YOUR OWN DOINGS. WE ARE NOT THERE TO SEE HOW YOU TRAIN OR HANDLE YOUR ANIMALS. WE ARE NOT THEIR TO SEE YOUR EQUIPMENT. WE ARE NOT THEIR TO ACCESS YOUR CAT(S)'S BEHAVIOR....
LEARN TO TRAIN YOUR CAT
FOOD MOTIVATED
Deron and I actually personally knew a Lion and Tiger Trainer and he was not the Villain that the Media and Animal 'activists' make them out to be. He DID carry a whip for his own safety, but it was also his cue stick. Can House Cats Be Taught to do Tricks and Agility....OF COURSE THEY CAN. IF BIG CATS CAN BE TAUGHT SO CAN YOUR HOUSECAT! And with kindness....firmness, but not meanness.
Most cats will follow the treat (such as a pinch of canned cat food) above their heads, in front of them. They will quickly learn Good Behavior (doing the asked task correctly) = Treat in Mouth.
Use treats, but NEVER feed them from you hand. Use a plastic spoon.
The Feathered Cue Stick
What is a "Cue Stick"? Here, at our house, we call it "The Magic Wand". It is not a whip, even if it IS a Whip, it is NOT used for whipping! The Cue Stick is an extension of your arm. It can reach to target areas you can not. It is used for guiding your animal as it performs tasks you are asking it to do.
For cats, a good one for starting out has a little bit of cord on the end, with feathers attached to the very end of the cord.. the feathers draw the cat's attention and to move the cat forward to come after, or to, the Cue Stick....
Feathered Teasers and Lasers are cute to use for Kitties, they will get your cat from one area to another... but, I will warn you.... if you always use a Teaser or Laser, YOU ARE NOT REALLY TRAINING YOUR CAT TRICKS OR AGILITY, YOU ARE ONLY TEACHING YOUR CAT TO FOLLOW A FEATHER.
Use this device to START your cat on training, then move your cat to praise and treats ~ weaning the treats down to just a few as you train more.
As time goes on in your training, try to not use a Cue Stick at all, but IF you need one or if you are training new tricks and tasks, start using Cue Sticks that are just "sticks" with no feathers on the end. One can be a wooden dowel with a painted end, just the tip, for the cat to know where it is you are asking it to go.
See below for How To Make Your Own Cat Teaser, Cue Stick...as well as how to make your own Cat Toys, Hammocks and other Kitty Crafts.
Work With Your Feline EVERY DAY!
Cats, like any animal DO like our attention. They just want to say "when". Don't let your cat do that. If your cat wants you to 'fuss over it', make your cat work for it. That is, pet your kitty, but then, set it in front of you had have it "Shake Hands" or "Jump Though A Hoop".
There is a thin line with a Cat between, not enough training and too much training. You will know. Just do not let the cat fool you into believing that you can NEVER train it.
To Train A Cat you WILL have to work with it at least a little every day.
Also. Do not let the cat 'get away with' not working. ALL ANIMALS NEED to know who is the boss....yes, even Cats and Geese. I train/trained both.
Don't Talk Too Much
When you are working with an animal, any animal, DON'T TALK TO MUCH! Animals will tune you out if you chatter.
You want to have cue words when working the animals, think Dog Obedience. There is the word, "heel", "sit", "down", ext. Find words similar to these and use them as you lead your equine so that they learn what it is you want from them.
For instance. Call the Pedestal "Pedestal", and when you want the front two feet of your cat's on it say something like I do: "Pedestal - Fronts"
You want to Name the pieces of Training/Show Equipment and say the Name of the Equipment to the animal as you work it.
You want to PRAISE FOR GOOD BEHAVIOR! Words. Don't always give your cat a treat. Never start giving a treat for each behavior. When you first start out and the kitty manipulates a piece of equipment, praise and give a treat. the second time, give a treat, the third time, just praise. After that, give a treat now and again, but not every time. Soft WORDS are an encouragement to animals just as they are for humans.
Let Your Animals Learn By Watching
Animals like people learn from watching others. Honestly. Animals learn by watching other animals perform the tasks (good behavior) and getting big ideas (bad behavior) by watching other animals.
If your Kitten or Cat is new to Tricks and Agility or if you are having trouble with one Agility Piece of Equipment, take your Cat, on leash of course, if you can at all, let them see other cats doing tricks and agility. Or if you have trained one cat to do something, place the one new to it inside a crate to watch as the other cat performs the tasks. Sometimes, if the animal (of any species) sees another do something.....and it not die....then the first will try it too.
Seeing the first animal doing the task (or getting big ideas) the first will just follow suit.
PHOTOS AND VIDEOS! TAKE A LOT!
I say this because I am really bad about it. And sadly, Deron and I lost a lot of photos first in divorces, then more to Black Mold.
Take a LOT of photos and videos of your animals, especially when training. Take photos and videos of them working and playing, and of course, while on the Agility Courses and doing Tricks...that is; learning and competing.
I tell you from years of experience and disappointment (that I did not take enough or too few) TAKE PHOTOS!
One day your dear pet will be gone. You will wish you had those photos and videos to look at. Plus the fact that some people just won't believe that you had an Cat that Performed Tricks and or Agility. Photos, my Dear, Photos!
One day you will be old. One day you will love to sit and look at and or show off all the photos of you and your animals and the things you have done together.
YES! BARN CATS (FARM RANCH OUTDOOR WORKING MOUSER) KITTIES CAN BE TRAINED TOO!
If your cat comes when you bring dinner and lets you pet and hold it, Yes, it can also be trained. It WILL take more work and patience and time....sometimes.
Many of us own Ranches and Farms and Barns. Many Cats have a job as Mousers. But those same cats are cats. Same motivation as any indoor cat.
Training a cat from a kitten, any cat from the time it is a kitten, will make all training easier, of course.
With 161 acres, several animal buildings, and living in Rattle Snake country, we have several Outdoor Cats. If you do not have mice, you should not have snakes (who come in to eat mice if they are there for them).
We feed our Barn/Ranch/Farm/Mousers on our Porch Railing, this way we can give them attention too. We try to hold them as kittens as soon and as often as we are able to. This teaches them not to be afraid of people...
Start Training Early
Start training your kitten right away....to come to it's name. Teach kitty to "Learn To Learn". Good Behavior = Rewards.
As soon as you bring your kitten/cat home, start the training...do this by being firm and fair. That is, mean what you say and say what you mean...without being rough.
Have your cat "sit", that is, give the command and move the cat/kitten into the sitting position, before you set their meal in front of them. Your will be very pleasantly surprised how quickly your cat will not only sit without you touching it, but it will go, on it's own, to the 'feeding area' and sit.
When your new kitten/cat jumps up on your lap, have it "sit", give the command, before you start making a fuss over it.
Talk to your new cat/kitten using one word talk. Give actions a word and watch Kitty catch onto your language. You might only have to say the word a few times, or it might take weeks for your own cat/kitten to catch on, but IF you are consistent, your Kitty will start not only listening to you, but will start doing the tasks you are asking for.
There are many people that do not believe it, but cats want to understand, they want your positive attention. Many times they do negative things....just to get your attention.
more to come
KITTY LEARNS TO LEARN!
One of the first Lessons you will teach Kitty is to Learn To Learn. Hopefully you will teach this if you know it or not. But if YOU know it and know how to teach Kitty to Learn, training will go easier and faster for you and Kitty.
What is Learning to Learn? Very simply it is the moment when Kitty's brain says, "Oh, my trainer wants me to do something, then I get a reward." They need to learn that Learning = Reward. It takes some animals longer to learn this than others. Take your time.
more to come
The 'Go To Trick'
This is a trick that you have not asked for. It is the trick your pet may preform to get the treat you are holding so that it does not have to do what is being asked, or when it does not understand the trick you are asking for, or it might perfom the 'go to trick' just to get YOU to give it a treat.
"Go To Trick" is a trick that is easy for the pet to do. It is a trick you have taught it, probably early on in training. It will make you smile when the pet does this trick.
IF YOU ARE ASKING FOR A PET TO DO A TRICK, DO NOT TREAT THE PET IF IT DOES NOT DO THE TRICK ASKED, BUT DOES THE "GO TO TRICK". Not only will you reward bad behavior, you will enforce that the pet does not have to do what you are asking, but can do an easier, or more known trick for the same treat. If you give a treat for the "Go To Trick" your further training will become harder and more frustrating for you.
When your pet does the 'go to trick', ignore it. Try not to even smile. Gently say "No.", and reask for the trick you are/were now asking for the cat to perform.
The Multiple Trick
This is something that most Human Brains do not pick up when watching your cat do tricks....the Multiple Trick. That is. When Kitty is doing a few tricks all at once, such as, "sit", "wearing an outfit" AND "playing the piano".
Take your time and teach each trick separately. When your cat is doing each one well, combine them.
Many times if the cat knows a few tricks that can combine, it helps training, because the cat is distracted by each from the other. In other words. If your cat will wear an outfit, buy does not really like it, put the outfit on and distract Kitty with another task....TREAT! This does not always work and might back fire...that is, Kitty might not like any tricks doing that day. But it is worth the try.
CLICKER TRAINING
I am NOT a fan of Clicker Training. Clicker Training was developed for Water Animals, dolphins, whales...I used tapping the side of the tank when I train Goldfish or Betas. www.fishagility.com
Your Cat/Kitten/Kitty however can hear your voice, use it. Use it to cue the animal as it is working. Drag out your word "Gooooooood" as the animal is "almost" correct. Use sharp "NO!" for/when wrong or especially dangerous moves.
Clickers were nothing but a Toy when I started training animals. Have you ever been to a Dog Training Class where the Clickers sound like crickets? And lots of them going off here and there and there and....use you voice. It is unique to your animal. They need to know it and mind it.
I know a lot of people depend on that clicker for animal training. If it works for you, use it.
KITTY TRAINING ~ BEHAVIOR AND TRICKS
Litter Box Training
God Given Instinct is your Savior here. Cats go potty where they can cover it. Buy a good Kitty Litter and Pan. If you use a Crate, cats love crates as much as dogs, when they are taught that the Crate is there 'safe place' they will return to it over and over and over...leave the door open for them as they learn.
It is best if you can set your Cat Crate can be set where your Kitty Litter Pan will set for throughout the cat's lifetime.
When you bring home a kitten or new cat, crates are great for their own safety. This will introduce them to the family, smells, sites, other pets, slowly and from a safe place. Set your kitty litter box inside the crate. Nature will take it's course.
At first, only let kitty out when you are around to watch over it. Have the cat sleep inside the crate with the door closed. Also when you are not around when it first comes to live with you.
Deron and I also set up another Kitty Litter Box, but we usually have more than one cat using them.
Soon, you can take the Kitty Litter out of the crate, move the crate, or even do away with it, and kitty will use this all alone. Going to it as needed.
KEEP YOUR KITTY LITTER CLEANED! Some cats will refuse to use a 'dirty' Kitty Box....this is where cats start using other places in homes.... If this happens with your cat. Put the cat BACK INTO the crate with the box at night and when you are not watching it. This is not cruel, the cat will think of the crate as it's bed. Your might even, if you have had trouble with potty elsewhere, leave the crate next to the kitty litter and see if this helps
Teach Your Cat To Come When Called
Another VERY EASY task to teach your pets....all pets.
When you feed them, before you pet them, before you make a fuss over them, call them by name, go and get them if you need to, but call their names.
The idea is.... They Hear Their Name and THAT Equals Pleasure and Reward. Very soon they will come running from where ever they are to come when called...
AND THIS COULD SAVE THEIR LIVES!
Knowing their own names and coming when called is also a good foundation to trick and agility training. Deron and I call it, Learning To Learn. Once they Learn To Learn, they are ready to be taught...
Training Your Cat To Walk On A Leash
Teaching your cat to walk on a leash is not just cute. It is very functional. It might or might not take more then teaching a puppy to walk on a leash, but if you are patient and kind, and do not give into the cat that rolls around and flops as it is a fish on the line, you will be able to teach this to your own kitty.
THIS TAKES TIME AND PATIENTS AND PERSISTENCE AND CONSTANCE....BUT IS SO WORTH IT IN THE END!
The first thing you need is a Cat Collar, or Cat Harness, and a Cat Leash. Cat's need a light weight leash.
I think the most important thing to tell you is...DON'T LET KITTY WIN THIS ONE...or you have taught Kitty it can will anything it does not want to do, or does not want to do at the moment.
This is NOT a battle. This is NOT Tug Of War. This is training. Slow, easy, firm, training. Are YOU up for it?
That said. Many cats will catch onto this task quick and easy...most do not.
To start, put your collar or harness on Kitty and give Kitty several of your BEST treats. Or. After putting the collar or harness on your Kitty, feed Kitty a really tasty meal. Take the harness or collar back off Kitty. That is it for the first lesson. But later in the day, repeat. Do this twice a day for about a week. Collar or Harness goes on, Treat Follows.
The next week. After Kitty is fine with getting the collar or harness onto it's body. Put the collar or harness on, treat/feed and leave the collar or harness on and do something else fun with Kitty.... like play their favorite game. After, again, take the collar or harness off Kitty. Do this twice a day for a week.
Yes. Properly training a cat to walk on a leash takes time.
OR! You could have a Cat that you handle a lot and is used to you putting clothing and other items on it. Or. A calm cat. Or. A very trusting cat...
To train Mrs. Dillon to wear a Collar we put it on her one day and held her, so that she could not fight it. We petted her, talked to her sweet, as well as said, "No." when she was fighting the collar on her neck, and after letting her roll around on the floor with it for a few minutes....took it off.
The next day, see photo, same thing....but when we put her on the floor, she only fought it for a few seconds then went on about her day. She wore the collar all day.
Now. That third week do just as you have, but put a leash on your Kitty. If Kitty goes to the end of the leash BE A HITCHING POST.
When Horses are trained to Lead and or Stand At A Hitching Post, they are tided to it. The trainer often steps back and just makes sure (with quick release snaps) that the animals are safe, but the Trainer does not interfere. The idea is to let the Hitching Post be "the bad guy holding them down". Once the animals learn that they are not going to 'get free', and or 'they are not going to get hurt", they calm down and the real training begins. For each animal, this can be a different time frame. That is, some take longer than others. Be prepared to be very patient.
If YOUR cat rolls around screaming on the floor, ignore it. YOU know that the harness or collar is on the animal properly and unless something really odd happens, Kitty is safe. IF you baby, make a fuss, give in, to the drama....you are done with Leash Training, Kitty has won. And it won's stop there. YOU by giving in and babying the cat, have taught the cat to throw a tantrum and get it's way.
Before you put Kitty on a leash for training, have some Treats out, a Teaser Stick, and Your Best Humor. You might want someone to take photos. But no laughing at bad behavior.
Put Kitty on the leash, holding the leash taught so that Kitty is right beside you. Treat Kitty. Now take a couple of steps forward. Use a cue word(s) for Kitty when you are ready for movement...like, "let's go" or "heel" or what ever you choose. If Kitty moves with you without cuing the leash with a gently tug, make a big fuss and give Kitty a Treat. If not... Use the Teaser to get Kitty to move foreward...but only move the teaser as far as you walked, you do not want Kitty to 'take off after the teaser and hit the end of the leash. Make a fuss and Treat Kitty for moving even a little. Repeat 3 times....lesson finished for this section. Later in the day, repeat 3 times. Each day for several do only about his much. Do NOT get ahead of yourself and ruin your training by trying to see how far Kitty will walk with you. Slow and easy is what is going to train Kitty to walk on a leash.
When Kitty is doing well taking just a few short steps, little by little by little start walking a bit further. Soon, Kitty will be walking anywhere you want to go, beside you on a leash....and you will be the envy of a lot of other cat owners.
And. Do I even have to say it? Never walk Kitty on a leash where it is unsafe for Kitty to be, such as a Dog Park. When walking outdoors always be aware of dogs and children that might run up and want to grab Kitty.
Cat Leashes
Why Not A Dog Leash? Cats are built lighter weight than dogs. You could certainly use a Leash that was made for a small dog IF it has a small snap on the end to hook to the collar or harness. What you do NOT want is a heavy leash with a big and or heavy snap on the end. Why? They snap will pull down and annoy your cat.
Light Weight Leashes are all Kitty needs for walking safely around town.
And have fun shopping for your cat's leash and collars, harnesses, they make such cute ones to choose from.
Cat Collar(s)
Among 'Cat people' there will always be 'the Collar Debate'. Some people love them, some hate them and blame them for misfortune on cats that wore them.
I will say I like them. I have used them for a LOT of years and they have worked well for me.
Years ago I had a Kitty named TC. I worked in an office at a Factory and they had mice! (and rats!) I asked and asked and asked if I could have a cat there. They never answered yes or no. One day the 'guys' (that worked there) came in and said that there was an itty bitty kitty in the Trash Can. The 'can' they talked about was a Trash Bin, they type in cities and factories that you could park a car in.
I asked one of the guys to go in and get it. I named the Kitty TC, for not only Trash Can, but I worked in a Traffic Control (think signs and barricades and cones for Road Work) AND this little WILD SQUIRREL was going to be Top Cat, like the cartoon.
TC was WILLLLLD! We really had to work with him to even get near him. But every day, several times a day, we did just that...in thick leather gloves!
Every Friday Night I would hook a leash to TC walked him out of the factory, a good walk, across the parking lot, and into my vehicle. He spent the week end at my house. I had to cats at home and they loved to see him come.
Every Monday Morning I would load TC up and off to work we would go. Then once there, hook his leash on and the people there go the biggest kick out of seeing him walk so nice on a leash and coming to work on Mondays.
After several years taking TC from home to work and work to home, I quit that job, and kept TC. He lived a long life and was a wonderful pet cat! After I was gone with TC for a few months, they got a new Kitty, not near as KOOOOL as TC, but another Mouser indeed.
That Collar that TC wore also helped when he was little and wild to give us something to hold on to and tame him.
Just keep in mind. That if YOU collar you Kitty, YOU alone are responsible for that decision!
Cat Harness (Harnesses)
If you have never seen a Cat Harness have a look at it before putting it on Kitty. There are a few different types. The leather or webbing types are made with one collar around the cat's neck, and one collar around the cat's ribs, just behind the front legs. The other type are a mesh vest, or a cute little outfit with a ring on it for the leash snap.
Cat Harnesses NEED to fit snug. Real Snug, just less than tight...or Kitty WILL slip out of it. Once Kitty learns it CAN get out of a Harness or Collar, it will work hard every time you put one on it, to get out of it.
I like Cat Harnesses, but Harnesses are not made to stay on the Kitty full time, and most cats do not like the Harnesses put onto them. Working daily with Kitty putter the harness on for a short time this will help a lot. You should put the Harness onto Kitty even on days Kitty will not be going for a walk to just get Kitty used to the feel of the Harness on it's body. Let Kitty do Kitty's normal daily tasks wearing the harness...as you keep an eye to make sure that there is not trouble with the harness as Kitty wears it about.
How Leash Training Can Go Wrong, Very Wrong
Many times when people try to train their cats to walk on a leash they make all sorts of mistakes. Not only does/did the cat not learn, those cats hate collars and harnesses to this day...or the day they die.
You CAN NOT hurry leash training. Take the time it takes with each cat. The length of time it will take for one cat can and often is, very different for another cat.
Do pull Kitty along! Don't be mean to Kitty. The idea is to teach Kitty to walk on a leash, not to drag Kitty along. Be patient.
This kittens harness is way too loose fitting. The kitten can slip out of this and run. And once they learn to do that, they try, try again. Most folk give up and feel sorry for kitty "flopping around" at the end of the leash. Two mistakes in one training section.
Leashes with snaps that are too large for Kitty will pull down and over on the collar or harness making this already awkward training more uncomfortable and scary for Kitty. Use a light weight leash with a small snap on the end. One with a loop, at the other end from the snap, for your hand is best.
DO NOT USE A LONG LEASH. Kitty needs you to stay near it. Also you do not want Kitty to run and HIT the end of a long leash. You will keep Kitty right near you when training and later when Kitty walks along with you.
I can not believe I need to say this, but it seems I do: DO NOT LET YOUR CHILDREN PUT A LEASH ON KITTY, unless you are right with them having the children treat Kitty properly and this only after Kitty is trained to walk on a leash.
NEVER LET CHILDREN, DRUNKS, DRUGGIES, OR STUPID PEOPLE DRAG KITTY ON A LEASH!
Teaching Your Cat to ~ Taking Your Cat Out In A Carrier or Stroller
"I just through her in the Carrier and off we went."
Oh? Was there a lot of screaming coming from your Carrier? Did you take a screaming, scared, cat into places where people were trying to shop or eat or work?
Yes. You can, 'just throw the cat into the Carrier and off you go.....' But it is a bad idea.
Start with the Carrier/Stroller at home. Set it up and let the cat go to it on it's own. You might be surprised to find your cat sleeping inside of the device...good. Give the kitty a treat there.
Then, slowly, over time, move the stroller/carrier with the cat inside. Teach the kitty to LOVE going places by making the trip fun...with food treats.
If you take the cat out into the very hot or very cold, I will promise you, THAT is how the cat will see this item. Take them out on nice days.
The same goes for a Cat Crate. When taking your Cat to the Vet, make sure that the cat does not ONLY go to the Veterinarian inside this item. You might not think this will matter...until you discover that you might get hurt, bit or scratched trying to load your cat for these trips. Set up the Crate and feed your kitten/cat there. Let it be a "nice place" to be. Take the cat outdoors inside the Crate and let it see the birds and squirrels....from an area where the before mentioned animals can not be killed and eaten by your cat.
Take the time it takes to train your animals...TO DO ANYTHING.
This is a photo of my kitty's, Mrs. Dillon, Cat Purse Carrier.
Teaching Your Cat To Ride In Your Bicycle Basket
coming soon
Teaching Your Cat To Jump Through A Hoop
This trick is such an easy trick to teach and will teach your cat to learn.
First you need a hoop that is the correct size. You will need a hoop about 12" -20" in diameter. Remember the old Jarts game? Now one of those hoops would be perfect, if too large you can take them apart and trim them down.
Use a hoop according to the size of your (whatever species) pet. Other ideas would be an embroidery hoop, the outer rim of an ice cream tub top, a bucket cut apart and covered with fabric, a (thin) wreath, a tennis racket minus the string. There are many possibilities, just make sure that there are no sharp edges and if you will have an audience cover the hoop to make it attractive with pretty duct tape (it now comes in many colors) or fabric.
These photos are of Mrs. Dillon's first lesson on Jumping Through a Hoop.
To teach "Jump Through the Hoop", hold the hoop in front of the cat, right in front of the cat, who is calm and is in a safe place. You are holding the hoop so that it touches the ground. Call the cat's name while holding a treat in your other hand on the far side of the hoop to entice your pet to step forward to receive the treat. Here is where you might need three hands. If the cat does not come forward, or if it moves away from the hoop, give the animal a cupped hand nudge, or easy push, through the hoop. Praise Kitty for coming through the hoop. Use the word "good" as soon as the it comes through the hoop, each time.
Treat the animal, this is where clicker trainers would click the clicker (I AM NOT A CLICKER FAN on our Equine Agility page on www.doesmybuttlookbiginthesaddle.com I explain why).
Now, repeat this step over and over until your kitty comes through the hoop on it's own and is happy doing it. Always give a verbal command to the cat. I use "Through the Hoop". This is great basic training for Agility Jumps.
After your Kitten is comfortable coming thru the hoop on it's own, lift the hoop up just a bit. Each time your Feline has completed the task, treat, click or whatever you do to let the animal know it has done what it was asked to do and it has pleased you. Now, you can start raising the hoop off the ground just a little bit. Don't get silly with this and have the Hoop too High in the Air for safety's sake.
Train Your Kitty To Jump Through A Covered Hoop
Adding Glamor: After your cat is Jumping Thru the Hoop well, you can add streamers with ribbon (but you will need to train kitty to come on through, not stop and play with these). You can also teach your cat to jump a covered hoop.
Start by using old newspaper and covering about 5 inches on each side of the hoop. Add a little more paper everyday you work with the cat, keeping the middle of the hoop open and the paper equal so that the cat always targets the middle of the hoop. Slowly cover all but a small hole in the middle of the hoop with paper.
When you preform this trick for an audience, cover the hoop with tissue paper rather then Newspaper. You can also write on the hoop....if this is your last trick of a series write "The End" on the hoop. Other ideas are, at the beginning of your little show, "Welcome (your cat's name here)".
I have seen Cat Performers wet the paper before the cat comes through it, by doing this Kitty stops and tears the paper with their paw....cute, but it also teaches the cat to stop and tear....that small hole, that Kitty can see, will encourage it to come right through w/o hesitation.
Training Your Cat To "Sit" On Command
Teaching your cat to Sit is not only a cute trick in itself, but the basic move of several other tricks. I train my cats (animals) with treats. Cats are taught more easily on a table or even the couch then it would on the floor. A hungry cat will be more "eager" to learn (for a treat then a full stomached content cat. I also, as many of the books advised, use a small empty can turned upside down to put a small treat on top of it....a cat can easily, accidentally scratch or bite your fingers "going" for a treat. They also may bite at your hand when empty looking for a treat. There are some great small treats on the market for cats. I buy the semi moist treats in the Cat section of the Pat Store. I also bought a couple of small toys for after trick training to play with the cat.
Teaching the Sit: Put the cat on the table, or next to you on the couch. Tell the cat by name to "sit"..."Kitty's name Sit". Now gently push it's butt down as you hold the cat treat on the can in front of it's face....slowly lifting the can up so that the kitty sits down as it's head follows the can slowly up Give the treat and praise the cat. Now <grin> repeat this over and over and over, but not too many in a row and over several days. I work my cats several times during the day on the same trick . Be as consistent with your training as you possibly can, do the same thing with your hands and voice each time. Cat's take a bit longer to teach then a dog does. Teach one trick at a time to your cat. They first need to learn to learn or will become confused and learn nothing.
Teaching Your Cat To "Sit Up"
This Trick can only be taught after your cat already knows "Sit", and will sit still when you give the command. This is, however, a fairly easy trick to teach a cat.
With a small treat in your spoon, tell your cat to "Sit". When the cat sits, take the spoon treat and hold it right over the cat's head and just out of reach of the treat. Lift the treat upward as you tell the cat the command you will use, such as "Sit Up".
At first, as SOON as even one front foot comes off he ground say "Good!", and give the cat the treat. This trick will take a little time to teach.
If your cat is not understanding to follow the treat upward, take your other hand, the one not holding the treat, and pick up the cat's front foot, one to start, and move it upward, as you say, in a drawn out way, "Siiiiit Uuuuup". Again, treat the cat as soon as you start moving the cat upward.
As you progress with this trick, have the cat come upward more and more before giving the treat. Always make a big fuss for little progress from the cat. Cat's are smart and are looking for your approval and that treat, so hang in there with little progresses.
I have been training cats for almost 50 years. I started training cats to do tricks in 2003...Mutt, shown in this photo was my first Trick Kitty. I taught him to Sit Up by holding his body, gently but firmly in place, giving the command, then rewarding. He was a very clever kitten and learned this way. Mutt learned many tricks and I sure wish I had more photos of him.
Later, in the following years I taught this trick to cats like I have given instructions above.
Teaching Your Cat To Fetch
A childhood friend of mine, when we were in Grade School, received a kitten for Christmas. She named it Falstaff. He was so cute and so much fun. That cat was like a person walking around in cat skin. My friend Gail did not know any better so she trained him to do all sorts of things....
more coming soon
Teach Your Cat To Circle (also called, 'Spin', 'Chase Your Tail', 'Go-Round'
This is an easy, easy, trick to teach your cat.
Decide what you will call this trick, as it goes by so many different names, and stick to that same name each time you ask your cat for the task.
Stand or sit Kitty in front of you. Have your treat for Kitty ready. Give the Trick Cue, we use, "Circle". Either have Kitty follow your hand, with the treat in it, in a circle, or have the cat follow a feather teaser in a circle.
Wait for Kitty to make the FULL circle before you give the "Good.", and treat Kitty. Repeat 5 times. Next section do the same. After the third or fourth day of training this trick... give the command and wait to see if Kitty will go around on it's own without the circle motion made by you... you might be surprised. Animals seem to catch on to this trick pretty easily. If your cat does not, continue to move your arm and hand with Kitty til your cat understands the task.
Teaching Your Cat To Wear A Coat, Sweater, Hat, or other Clothing
Call them clothes, clothing, outfits or costumes... I just call them fun. I started designing and making Animal Outfits for my own, as a kid, I have made outfits for Dogs, Cats, Ponies, Goats, Horses, our Donkey, Ratties, Rabbits, Guinea Pigs and even Gerbils and Mice and Hamsters, if you go to our other pages you can see a few of our animals all dressed up.
When my friends and family saw my little guys dressed they told me I should make and sell them to other animal owners. And, no, no one was surprised, I dress my dogs all the time. I train animals and do all kinds of things with them. So no. Not one person was surprised.
There is a bit of training involved to have a Pet Fashion Diva, including just wearing a hat. And fit of the outfit is essential.
To teach your animals to wear the outfits you need to dress an animal you handle often. Put the outfit on the animal for short times. Just put the outfit on the animal for short times. Just put the outfit on he first few times, praise the animal with petting and talking to it and a treat. Soon, your animal will be sitting on your shoulder or lap or walking around wearing little outfits just like a little dog.
Do NOT leave your small animal unattended dressed in these outfits. Not only could it get caught in the outfit, you may be disappointed that your sweet, innocent, cute little sweetly will chew up that outfit in a heartbeat.
A snug fit is a good fit. On a cat the neck needs to seem tight (NOT BE tight), or they will step through it. It is hard for me to know the exact size to make the clothing for people's pets I have never met. So.... if the neck is too big and the animal is stepping through it, take it off the animal and with a needle and thread and sew just a couple stitches to tighten the neck piece of the outfit. Make sure you tighten the last knot of your last stitch very well. If the neck is to small, take scissors and cut a slice, very small slice at a time out of the neck line, little by little. An 1/8" is a lot with small animals... so just a very small amount at a time. Think sliver.
SWEATERS: Do not cut the threads on any part of a sweater. Sweaters are little knots made one after another, one by one, using the same thread throughout. If you cut them, they will unravel and fall apart. If your sweater is a bit too small stretch it. Literally and gently, pull the area that needs to be a bit bigger. After washing your sweater in cold water (NEVER wash a sweater in hot or warm water) you might have to re stretch it. Always lay sweaters flat on a small towel to dry. Just set a clean dry towel on a waterproof counter or chair and lay the sweater down on the towel to dry. If you sweater is a bit big in the neck area you will be able to take a stitch in it as you would any outfit. Make sure all your knots are good and tight.
You may hand wash or machine was most of the costumes that I make for animals. If there is glitter or a charm on them, hand was lightly. Let the item air dry. Have fun with your pets. Enjoy them. Love them...
Have fun showing off your cute little Fashion Diva. And take A LOT of photos!
Train Your Cat To Shake Hands
This is not only an easy Trick to Teach a Cat....it is the Foundation Trick for many other Tricks...such as High Five, Waving, Touching Items on Command, and more.
First try this: Many cats will put their paws into your palm if you slowly put your hand in front of them.
With your cat in a sitting position, put your hand, palm up, out in front of Kitty, Say "Shake" or "Shake Hands". Have good treats ready. IF your cat moves it's front paw toward your hand, and/or IF Kitty's front paw touches your hand, say, "Good Kitty", and give Kitty a treat. Repeat three times. Do this (3 times) several times a day.
If that does not work for your Kitty...
If your kitty has on a Cat Collar during this training it will help to teach this trick faster.
There are about five different ways to teach this to your cat. The way I like to teach it is easy and fast. Have your cat sit down facing you. You can sit in a chair, or, better, sit on the floor with the cat...you can just lean over too.
Place your hand around your cat's collar. With your opposite hand reach for the cat's paw that is on the opposite side of the cat from the side of the collar you are holding. Now say "Shake Hands" as you gently pull the cat off balance just a little bit. The cat's foot will come off the floor and at that point you take hold of that foot, praise the cat and give the cat a treat. Do this three times in a row several times throughout the first day of starting this training.
The second day, repeat the above once. Now ask the cat to "Shake Hands" and wait for the cat's foot to come up, if it does not, continue to use the collar as a guidance.
From teaching your cat to "Shake Hands" you can teach many other tricks such as "High Five", "Wave", "Patty Cake", "Play Piano" and other hands on tricks. Just use the "Shake Hands" as your guide, changing the Cue Word and moving the cat's foot as it raises it for you. Don't forget those treats when first training. We all work for rewards.
Teach Your Kitty To High Five
FIRST teach your cat to 'Shake Hands' (see above). And AFTER it has learned 'Shake Hands' well and does this each time you ask...
Ask your kitty to "Shake Hands High Five" and as the cat brings it's paw up to your hand, move your hand just a little bit at first, to the High Five position. Do this using "Shake Hands High Five" command about 5 times in a row, twice, at different times for a couple of days.
When your cat seems to get that "Shake Hands High Five" means something different, move your hand up higher toward the High Five Position. Keep moving it up, until you are all the way there. About half way up, drop the "Shake Hands" and only say, "High Five".
After your cat is getting it, and different times during the day from the High Five Training, ask your cat to Shake Hands. This way the cat knows you are not replacing the trick, but teaching something new....that it can earn treats for doing/performing.
There are many other ways to teach this trick. If your kitten reaches for your hand as you are working with it/training it, say "High Five, Good Kitty", and give your kitty a treat; see if the cat will repeat the same actions and treat again.
One you have taught the "Touch Target" task, you can also use this for 'High Five'.
Teaching Your Cat To "Touch Target"
Teach Your Cat To Wave
First teach your cat to "Shake Hands' and "High Five"...from there, you will teach the "Wave". When done from a distance THAI is a very cute trick.
more to come
Teach Your Kitty To 'Play Piano'
I have taught so many different types/species of animals and so many different animals to 'Play Piano', I have lost count. IT IS AN EASY TRICK TO TEACH....for one thing, the Piano gives the cue of "Good". On our Pet Rat Site,[url] www.theagilerat.com[/url] as well as www.guineapigagility.com you can see videos of some of our "guys" playing little pianos.
You need to find a small, cat sized Piano. Yes. You could use a human piano, but it might get scratched.
Little by little, and take your time, your cat will learn to hit the keys...keep in mind, your not going to teach your cat to play any recognizable songs... but it is very cute to see them bang the keys.
If you do not have a piano for your cat to play, check Garage Sales and Resale Shops (I have bought several for $0.25 - $5) This is an EASY trick to teach a dog, but will take more time training a Cat.
You could also use an electronic key board if you like. I usually start with a small electronic keyboard for their flat stability they offer when the animal step up on them when they first learn to hit the keys.
First you would start by sounding the piano while the cat is eating it's normal meal. Let it learn to hear the sounds. You might also hold your cat and have the piano off to your side. Gently hit the keys, now and again, this is to, again, let the cat hear and become familiar with the sound the items create.
With a small treat in your hand, or in a training spoon, hit a piano key and treat the cat and do this over and the next several days a few time each day.
Sit your cat in front of you on the floor with the little piano between you and your cat. Give the cue "Play Piano" and hold a treat just out of reach over the key board so that the cat must come forward, stepping on a key to receive the treat. Give verbal praise "good kitty" (or click if you use them) and a treat as soon as the cat as it hits a key. Repeat.
Your kitty, like Pavlov's dog will catch on pretty quick that it is the sound it makes with it's foot on the keyboard to get the treat. It will learn the command "Play Piano". Once it has caught on, move your hand out of reach of the cat, off to the side of the keyboard, so that the cat has to move one way or the other to make the sound with it's feet on the keyboard, this way it will hit more than just the one key. It might take a bit of time to teach the cat that it needs to hit more then one key to get the treat.
If your cat steps up on the keyboard, and misses the keys, while training, you have made Kitty reach too far and it stepped over the keys. Gently push the cat back WITH THE HAND THAT IS NOT HOLDING THE TREAT and gently say "No; Play Piano" and continue the training.
Teaching Your Cat To Open A Gift
You can teach your pet, any pet, to open a gift in a few easy steps....
Start with a small box. A mouse will need a smaller box then a GP and a GP will need a smaller box then a dog. Use a box that does not have a lid about the same size as your pet's food bowl.
Set a treat in the box next to their food dish when feeding. When they take the treat out of the box, say "gooooood" and remove the box. Repeat twice a day for a few days.
In a few days, after the animal has caught on to retrieving the treat from the box, wrap the box, but not the top, with colorful paper. Repeat the idea of leaving this with a treat in it for your pet....most will not even notice the box has changed, or if it did notice it did not care.
Now. Take a piece of newspaper, or tissue paper and wrap it around just the edges of the top of the box. Give a treat in this box, same as before, to the pet. Then next day make the opening a bit smaller, ie, rewrap the top of the box but extend the edges closer to the middle of the box. Give this to your pet as before. Then next day, make the middle smaller and so on. Finally, close the top with paper and watch the animal "open their gift.".
Teaching Your Kitty 'The Rocking Horse'
This is an advanced Trick. You will need a Teeter Totter to begin to teach this trick.
Your cat needs to already know how to and do well these tricks and tasks: Sit Stay Walk On A Leash (not required, but it will make the trick easier to teach) Come when called Back Up Use The Teeter Totter or and Sea Saw
Once Kitty knows how to use the Teeter Totter well, very well, once your cat understands how the Teeter Totter works... you might be able to begin to train this trick.
MOVE YOUR TEETER TOTTER OUT OF THE AGILITY COURSE TO ANOTHER AREA TO BEGIN THIS TRICK. You do not want Kitty to be confused, moving the Teeter Totter will signal to Kitty that you are asking something else, rather than just run across the Teeter Totter.
Set you Teeter Totter up on a Training Table if you have one. Or, be prepared to get down on the ground with Kitty.
If your cat is leash trained put a leash on Kitty and have Kitty start across the Teeter Totter. When it gets to the area RIGHT BEFORE IT TEETERS, have Kitty stop and stay. Then have Kitty take one step forward as you say the cue, "Rocking Horse". This is where the leash is going to help you gently guide Kitty as it goes forward. When the Teeter Totter teeters, have Kitty back up until the Teeter goes back down to where it was when Kitty began. Treat Kitty. Make a huge fuss over this. Teaching this is confusing to most cats.
Repeat. Only go this far on training this trick for several sections.
When Kitty is ROCK SOLID on the first part of the trick...move on. Have Kitty come forward, teeter, then back, before Kitty sits down, have Kitty come forward, then back again, sit and reward. Repeat this until Kitty is ROCK SOLID on this part of the trick.
As you continue to slowly train this advanced trick, add times that Kitty will 'rock' using the command, "Rocking Horse".
By using the Teeter Totter on an Agility Course for Kitty to run across, and using the Teeter Totter away from the Agility Course for the Rocking Horse, Kitty will cue to what you are asking.
This is a very impressive trick for spectators, one that will surely impress children and adults a like!
Training Your Cat To Ride A Skateboard
Believe it or not, cats like to go for a ride. They also seem to like Skateboards...maybe not as much as bulldogs like skateboards, but cats do like skateboards better than the average person might think.
First your need a skateboard. Make sure it is big enough for your cat to sit comfortably on and that the skateboard is in good repair (works well, in good shape, safe).
Take your time teaching this trick and if you can at all, start indoors when training.
At first just get Kitty to come over the the skateboard and sit on it, set treats on the front of the board....that is, AFTER Kitty gets on and sits down.
more to come
Using The Human Toilet
This is a task that will take a lot of time and patients on the part of all Humans in your household. Make sure, BEFORE starting this task with Kitty, that everyone understands that Kitty's needs for the toilet will now come before theirs. Think this out carefully if you have small children in your home.
You will need either a pan or a kit for training that will fit over your commode, and under your toilet seat. You will also need to buy the more expensive flushable Kitty Litter for Kitty to use.
To start. Move your cat's litter pan closer and closer to the toilet Kitty will be using. This might take time in and of itself depending on where your kitty litter box/pan is located before starting.
more coming soon
I have found that if I work with my cats about an hour before feeding time, and use treats, they 'will work for food'. At this point, about an hour before feeding time, they are not yet really hungry, but would like to eat a little something.
I set up and host a Cat Tricks Yahoo Groups elist called, Cat Tricks, where we talk about all things cat. Please come and join us and tell us all about your cat(s) and their/your training.
Where To Find Cat Trick Props And Kitten Agility Equipment On A Budget
Every time you go to a Garage Sale or to the Thrift Store or even in a Dept Store Toy Dept. keep your eyes open for not only items you can use to train your cat, and if you have other animals you are training, (dogs, rats, goats, hamsters) look for items for them to use too.
Think 'outside the box' as your shop for your Feline Items. Use your imagination and think.....'what might work well for...'
Some ideas of items to look for.....
A Hula Hoop for your cat to Jump Thru A Toy Piano for your cat to learn to play an old belly bag to place treats in for the cat to work for cute sunglasses or little hat for the cat to learn to wear human toddler size slides for the cat to learn to go down of course always look for small stuffed toys and baby arches with hanging toys, cat's love these (look by the baby clothes for these items) a small ball for your cat to learn to play soccer with Child's plastic bowling pins with balls a toddlers size basket ball court for the cat to learn to put the ball through small traffic type cones for your cat to weave wooden dowels to use for Agility Jumps or to make kitty crafts small clean tires to make a Tire Jump with stuffed little animals for your cat to learn to place in a toy box a toy box to hold it all you also might find cat training books, nice collars, cat beds, leashes, crates, kennels...you just never know what the next Garage Sale might have...happy shopping.
Scroll Down For More Ideas For FREE and CHEAP Props and Equipment
CAT/KITTY AGILITY!
Check our Navigation Menu....we have/do Train about every species of domestic animals to do a bit of Agility....it is FUN for animals and Humans!
Deron and I have taught/teach everything from Mice to Horses and Fish to Enjoy an Agility Course! We also have information and instructions on how to build your own Agility Equipment Pieces and Courses. For Cats, also check out our [url]Rabbit Agility[/url] website for more information. The Rabbit Agility Equipment should be just about the right size for Felines too.
These photos were taken, many moons ago, just after we made the Tunnel for our Rabbits. I set it down to take photos and EVERYONE wanted to play! The Black and White Kitty in this photo lived to be 17 years old and was he ever a fun cat!
Cat Agility has become very popular and has a "Mother Club" that Certifies Competition. It is fun and you get to meet and know people that have the same interests as you. Do an Internet Search to find out more about where you could go to Train and Compete with others and their kitties.
An Agility Course is a bit different than an Obstacle Course, or Maze, or even what they call "Trail Class" at Horse Shows, but Agility is along the same thoughts as the others mentioned.
Foundation Agility Training
BACKCHAINING
Backchaining is teaching the animal with the last piece of equipment as the last place it will end. To train your pet with backchaining to a cage or food dish you first set that item at the end of your training table. Now set your pet in front of the food dish - be sure to say the word "good". Do the same thing three times in a row three times a day.
Next, set a small jump or hoop between the animal and the end piece (treat or cage). Encourage the animal over the jump or through the hoop, give the cue word for the item, we would use "over" for the jump, and "through" or "hoop" for the hoop. When the animal goes over or through, say "gooooood". You might have to move the item so that it is ever in front of your pet as the pet tries to get to the end piece or it's rewards. When it gets to the end piece repeat the word "good". Repeat this three time in a row, three times a day.
When the animal is doing going through the hoop, well to the point of understanding, add another piece of equipment in front of the first. In other words, if the animal is doing the jump that you set up in front of the reward end item, set a second piece in before the piece it knows. Say you chose another Jump. Set the animal on the table further back and in front of the new piece or jump and teach as you did the first. As it goes over this new piece, on your cue word, say the word "good", give the next cue for the next piece that is set up between it and the end reward.
When it goes over the next piece, say "good" and again say "good" when it gets to the end piece. This is what is known, tried and true, as backchaining. As soon as the pet learns that the end piece reward is just ahead, it just needs to learn how to get there.
Feather Chasers and Laser Pointers
I will tell you from the word go....I would only use these to start training. However, they are allowed in many Competitions.
You can use the Teasers, to guide your cat over, under and through each piece of Agility Equipment.
But. If you use a Teaser or Taser, you are only teaching the cat to chase, NOT Cat Agility. Use Teasers only for starting, and then, sparingly. Cats Love Teasers and Tasers, it is built into their genetic make up to chase them.
For Training Agility and Tricks. If you teach your cat to run with you, teaching it each jump, and other pieces of equipment piece by piece, with lots of praise and treats, your cat will be faster on the course and way more impressive.
Teaching The 'Mark'
If you teach your cat to 'Mark' (that is not the same type of 'marking' as cats can do, especially males) see above for training this, you can put the 'Mark' on the far side of the pieces to teach, and the end of the course, once taught, and send the cat for the 'Mark'. I have not seen 'Marks' mentioned in Competition Rules. <?????>
This can be taught to any species of animals and it is NOT hard to teach.
What is a Mark? It is a Spot of the Floor or Ground you have Marked with an X or a item.
In your training area, make a MARK on the Floor, or on Your Training Table, or make or buy a small piece of fabric or plastic/rubber that is big enough for at least the animals front feet....using a large MARK to start is best, one the whole body can fit unto. You can take later the size down as you train.
I recommend a piece of non slip rubber, such as a piece of a Yoga Mat or Place Mat. This way it is clear where the MARK is and it won't slip if the animal runs to it and stops.
Feed your animal on the MARK for about a week. That is a meal, not leaving food sit on it throughout the day. Give treats on the MARK. Every time you set a food treat or meal down call the animal over, BY NAME, and say "MARK" or "PLACE" or "TARGET". Call it by name each time you call it to the MARK.
When your pet is on that is standing over the the MARK you say, "Good Boy" (or Girl or their Name). Now do this several times a day.
If you find your pet at the MARK without being asked there. Do NOT treat. YOU are training your pet, it is not training you. If you treat your pet when it goes to the MARK, your pet will go to the MARK rather than do other tricks and tasks and agility you will be trying to train it to do.
After your pet comes to the MARK when called there, back up yourself away from the MARK just a little bit and say "MARK". Make a big fuss and treat your pet if it goes to the MARK. Slowly and over many days, back away from the area and soon, with work, your pet will go to the MARK when told to.
Another way to do this to reinforce the MARK, is to set a treat on the MARK when your pet is not looking, then from far back (closer if you are just starting the trick), call your pet by name and say, "MARK". It will be rewarded straight away if it goes to the MARK.
After your pet is really consistent about going to the MARK when you send it, you can start moving the MARK. Move it very little and slowly away from the first area you had it set. Over time, you will be able to set your MARK and send you pet to it....JUST MAKE SURE YOU SHOW YOUR PET, WITH A TREAT ON IT, WHERE YOU HAVE MOVED THE MARK TO before you ask it to go there after moving the MARK.
Name The Pieces
Name Each Piece Of Agility Equipment and Say The Name As You Take Your Equine Through It
If you want your Cat to Learn, really Learn, like I said above, do not talk too much as you work your animals. However, Praise....and as you approach each piece of equipment, as you enter into it that is, say a one word name for the piece.
Call them whatever you want. Just make sure each work is very different from another. As You Weave the Poles, you might use the word, "Weave". But don't use the word "Squeeze" for the Tight Spaces. Use a word like "Tight". The words Weave and Squeeze sound too much alike.
Also, call each of your Jumps by a different name. Use One Word. Like "Hoop" or "Flower" and or "Cavaletti" and such.
Call your Teeter Totter, just "Teeter". Call The Sea Saw as it is. Call your Rocking Horse just "Rocker" (Advanced Cat Trick).
One of the reasons you want to name your equipment pieces is that it will cue your cat where you are headed next. When speeds are taken up, this will matter. It will help guide your feline.
more coming soon
Teaching The Jumps
Many times when you take a photo you may not get the photo you were hoping to, but something better. Note the spools on this Spool Jump....see the kitty?
When we train our animals, many, make that most of the time, there are other animals watching...and when/as they watch, believe it or not, they can be learning.
This Spool Jump is a Great Size for a Cat To Use for a Jump. It is not too high, wide enough and about right for the cat to go 'over' and not just run 'under'.
To teach your Kitty to Jump over an Agility Jump, start with a low and wide Jump. Low so that the cat does not go under it, but learns the word "over" with the task, wide so that it will not go around the Jump as you work the cat, with your 'cat teaser' right in the middle and just above the Jump as you encourage Kitty with your sweet soft voice.
Take your time. Be sure to say, "Good!" as the Kitty comes over the Jump. And say, "No." as Kitty goes under the Jump. Try not to laugh when Kitty does the wrong thing....your laughter and even smiles will give Kitty the wrong message as you train.
Bar Jump
Deron made this Bar Jump with PVC Pipe (piping and joints). Teaching it to your cats should not be hard to do. You might however want to set a board over the bars to block the area that the kitty might crawl through until the cat understands it is to go 'over' the Bar Jump.
Bar Jumps are impressive on an Agility Course. And really fun to watch as Kitty comes over them with ease.
Tire Jump
Tires come in all sizes. Yes, this is a Hamster we had and trained to do an Agility Course. Although 'they' don't use Tires for Jumps any more....I really like them and think they are a cute piece for any species (you can see our mice have one too on our www.mouseagility.com site) In my opion, actually tires for Tire Jumps adds 'pizazz' to an Agility Course.
Tire Jumps are not hard to build. But the need to be built sturdy. See below for information about how to build a Tire Jump Frame and how to hang your tire within.
You train the Tire Jump the same way your have taught your cat to "Jump Through A Hoop". In fact if you are training alone and seem to need more hands, using a Tire Jump might be a great way to teach your feline to "Jump Through A Hoop", once it learns either, it will do both. You can see above how to teach this trick.
Kitty Agility Hoop Jump
We call this Hoop Jump, DIY or Home Made using PVC Pipes, by Deron, The/Our Alien Jump. Decorating and or Building with ideas make an Agility Area with Agility Equipment set up more appealing to get people out there with their animals. It is just fun.
Train this as you would the Tire or Hoop Jumps.
The Cat Agility Tunnels ~ Open and Closed
Open Tunnel
Most people find, when training cats to Agility Courses, training the cats INTO the Tunnels is EASY! Now, training them to come out....THAT will take some work.
Agility Tunnels do not have to be very long in length. I, yes, I, made this one out of a small barrel. Note the duct tape around the openings to cover any areas that might have still been a bit sharp. Yes. I did make this for our Rabbits, you can see our site for them too, but the size will work well for cats too.
Training your cat to Run Through A Tunnel might take some time. That is. Training them to come out of the Tunnel. Cats love to be in areas like the Tunnel offers.
Start training the Open Tunnel BEFORE you train Kitty to run through the Closed Tunnel. When Kitty is always reliable on the Open Tunnel, start the Closed Tunnel, but mix in the Open Tunnel when training.
BE PATIENT. TAKE YOUR TIME TRAINING THIS. DON'T GET MAD AT KITTY. DON'T LAUGH AT KITTY.
I think that using a Cat Teaser on a stick with feathers, and bell, is the best way to start and train Kitty the Open and Closed Tunnels.
Since the Tunnels take a bit more training than Jumps, make sure that your Kitty is doing well on Jumps before starting the Tunnels.
Set up a Jump or two BEFORE the Open Tunnel and let Kitty start at the Jumps. Standing on the far side of the Tunnel, that is, the side that Kitty is coming out of, and stick your Cat Teaser into the Tunnel where Kitty can see it. Tell Kitty, "Though." And pull the teaser just in front of Kitty so that Kitty follows the teaser through....REWARD! Repeat three times and that is it for the first lesson.
If Kitty does not come out of the Tunnel, call it, show Kitty a treat to eat, and tickle Kitty with the teaser. Coax Kitty out of the Tunnel.
Keep your cool. Stay in the training mode. Reward Kitty for good behavior, and ignore bad behavior, other than a sharp, "NO!". But make sure Kitty understands before you use the word, "NO!" sharply.
Remember Agility is ALL NEW to Kitty. And Kitty wants to play the way Kitty wants to play...
As a Trainer, your job is to teach Kitty how to play this game the human way. Once you do, once Kitty understands, Kitty will LOVE Agility!
If Kitty has a Tunnel as a toy your cat will NOT train as easily when it comes to the Tunnel. It will only see the Tunnel as a toy that it goes into and stays into, and one that it might think you will go away if it stays inside of. I do NOT recommend Tunnels as Toys for Agility Cats.
As I have said before, buy the 'good' training treats for Kitty if you really want them to pay attention to what you want them to do. I have said this since I was a teenager, humans do not go to work each week without their rewards at the end...paycheck. Think of the treats as Kitty's Paycheck.
Closed Tunnels For Kitty
This Closed Tunnels is made using a cut out from a barrel and an old tarp. It is long enough for training and for fun at home. You do not have to spend a lot of money to have a fun and nice Agility Course for training your feline.
Start training the Open Tunnel BEFORE you train Kitty to run through the Closed Tunnel. When Kitty is always reliable on the Open Tunnel, start the Closed Tunnel, but mix in the Open Tunnel when training.
You train this piece the same as the Open Tunnel, for starting, but you fold the fabric back, so that the Closed Tunnel is actually open at first. Then, slowly, very slowly, you start closing the Tunnel. At first just bringing the fabric down over the top of the Tunnel...adding more down as the kitty learns to come on out.
Take your time opening the closed end of the Tunnel when training Kitty. For the first several lessons, start each with the closed end folded back to remind Kitty how the Closed Tunnel works.
Be very patient with this piece of agility equipment. It might be that your cat runs right through, it might be that it will take a month or more to teach this ONE PIECE. Kitty will learn it if you keep your cool and train well.
KEEP IN MIND. WHILE POLYPROPYLENE TARPS ARE FINE FOR KITTY TO GO THROUGH A FEW TIMES, OVER AND OVER WILL BUILD STATIC IN KITTY, especially true for long haired cats. If you are using a plastic or polypropylene tarp, do not let the skirt of the tunnel drape more than 3' and don't have Kitty go through more than a few times...and not over and over, let kitty run over some Jumps or other pieces of equipment.
Not An Agility Tunnel
THIS IS NOT AN AGILITY TUNNEL! This Tunnel is a fun toy for a Cat or Rabbit or Ferret. But it is not the type you will want to use for Agility Equipment.
The cat will not understand you want it to COME THROUGH this Tunnel. It will have a great time going in and out other holes you do not want it to, as well as popping out the top.
You will want a Tunnel with Openings at both ends. But not one with more than two openings.
Also, as I have said above. Cats that have Tunnels for toys are not going to want to run through when asked. Cats that have Tunnels for toys use them for hiding and sleeping.
Wonderful Training Tunnel!
This is a GREAT Kitten Training Tunnel! But take the attached toy(s) off the end and don't let the kitten use this Tunnel except in training. Why? If the kitty learns to go in and not come out, to play inside, sleep inside of it, it will not use it correctly when you are asking it to run an Agility Course.
See rules and regulations for Official Agility Equipment and Course sizes.
Balance Beam
Cats LOVE These! Cats are Agile Creatures! And Cats LOVE to play. The only thing you will really have to teach your cat with a Balance Beam....is to cross it on command....as you run with it on the ground.
Cats know how to use a Balance Beam. You just need to teach them to Run it as they come up to it on the Agility Course. How do you train this....easy!
By using your cat teaser, or just calling Kitty along the Beam, use your cat treats on the far side and Kitty will catch on quickly to this fun piece.
Your Cat's Balance Beam does not need to be real high. And when first training you should keep it low. However, these are CATS, and it is ok to take that Balance Beam up.
Weave Polls
What will you use for your Weave Poles? There are so many items that can be used. Something that moves so that you can move the distance as you train your cat would be best at first. But with a little work, stationary post stuck in the ground can be used.
Traffic Cones are WONDERFUL! And they come in so many sizes. For cats you would want them so that they are just a bit taller than the cat. So that the cat clearly has to walk around them. DON'T STEAL TRAFFIC CONES FROM ROADWAYS.
MORE TO COME
Teeter Totter and or Sea Saw
There is a difference between a Teeter Totter and a Sea Saw. When training animals, ALWAYS start with a Teeter Totter. The first two photos above are of my Rabbit/Cat Teeter Totter. The third photo is of a Sea Saw.
The pivot points are quite different between the two. The Teeter Totter has a lower, and can be changed from using a smaller size for training, to a larger, for 'showing off'. The Sew Saw fulcrum is a full piece that makes a much higher elevation swing.
When training ANY animal to the Teeter Totter and or Sea Saw you should always start with a low fulcrum (round thing that makes the Teeter teeter). A larger, higher fulcrum, with a big drop can scare an animal into never wanting to do this again.
Start low, start easy, work your way up to the larger, if you even want to or are able to, as you go. DON'T GET IN A HURRY WHEN TRAINING ANIMALS. ESPECIALLY CATS!
Set your cat on the down end of the Teeter Totter and call it forward. If you have a very low fulcrum there should be no problems when the Teeter teeters. If you have a 6" or higher fulcrum, catch it and let it 'fall' very gently.
Use your voice to encourage kitty across the Teeter, fast or slow let Kitty go at their own pace as they learn.
Reward Kitty when she comes all the way across. One way to teach an animal to hit the end marks, that is not jump too soon off the equipment is to treat them at the end of the piece of equipment. If you set the treat right at the end of the piece, on the ground, their body will still be at the end of the piece as they stop and eat their SMALL treat.
This is a photo of me training one of our Cocker Spaniels to use the Sea Saw. Note that I have a snug, but not tight leash with my left hand, letting Frankie know that he is to stay close to me (not jump off) with my right hand there encouraging (and ready to catch him) It takes all your attention, and both hands to teach an animal to walk the pivot of a High Sea Saw.
A-Frame
A-Frames NEED to be very stable. Animals usually hit these at higher speeds when running the course. Your A-Frame NEEDS to be wide enough, but not too wide.
The Yellow Paint on Agility Equipment is an area that the animal must touch going on and coming off. In other words the animals, at high speed, should not basically jump over, just touching the top part, on agility equipment.
A-Frames with the down hill are a piece that animals just want to jump off. The idea is to train slow. One tip is to put the animals treat on the ground right at the edge of the off side of this piece. THAT will slow the animal down, keeping it's body and feet in the yellow zone, making sure that the animals touches that area and does not just jump off.
more to come
Tire Jumps/Weave/Tunnel
You need to have the Property to be able to set up Vehicle Tires like this. But if you have the room, these can be used for many species using them different ways.
Deron had a great idea to set these 10' apart, that way, I could or not add other types of Jumps between them for cats.
Cats and Small Dogs could use the Tires set this direction for Jumps, a Tunnel, or to Weave in and out of one side.
We plan to set up more tires end to end on another side of our Agility Area soon. These will be used in another way for Agility.
Setting Up Your Cat's Agility Course
Where and how many pieces and how, does one set up an Agility Course?
Where is up to you. I have a very small house so we train outdoors. this means with some of our kitties we use a collar and leash. I have two Agility Areas set up here on our 161 acres. We do not have neighbors, (to complain) so it is an ideal place for me.
If you have a room in your home, a hallway, or basement you can safely set up Cat Agility Equipment, that is where your Cat Agility Course should be set up.
You do not have to have a huge area. You do have to have an area that is safe and where the Agility Equipment can be spread out, but not necessary "left out".
Most Agility Courses have at least 4 Jumps, not always set up in a row. Make the Course fun for you and your kitty. Include Jumps and Tunnels and Weave Poles. Nothing has to be Fancy, or even Standard or Regulation Agility Equipment... as long as it is SAFE and STABLE for your Cat....you can have a great time with Kitty.
How much or how many pieces of Cat Agility Equipment should you set up? How many have you trained? Remember. Train slow, one piece at a time. So as you train another piece of Agility Equipment, add it to your course.
As far as Rules, Specifications and Regulations go, there are a few Cat Clubs that offer Cat Agility Competition. Each one has their own ideas about what the Equipment should be, how it should be set up and how many pieces of equipment should be used on a Competition Course. If you plan to Compete with a Club, KNOW! their rules and regulations before you sign up.
I have worked with MANY different species of animals with Agility Courses. I also work with animals enough to know the "normal stride length. I do have to disagree with Cat Clubs that set their Agility Equipment too close, that is 3' apart, and that set their Weave Poles too tight. I have also seen some Cat Clubs that offer Agility Equipment that is too small for the Average Cat size. Size Really Matters When It Comes To Agility Equipment.
Deron does the math. Our Weave Pole are set at approx 20" - 26" apart. This gives the cat room to move it's body through one pole before reaching the next pole in the line. It is also more room for stride when they become faster.
We set our Cat Agility Pieces 5' to 7' apart. Depending on the piece, it could need a bit more room between. If you are working with a Kitten, or younger, or smaller cat, the equipment could be set closer together. If you have a really large cat, set the equipment further apart. Give Kitty room to move.
When setting up the course it should be set something like this.....
Bar Jump Bar Jump Tunnel Window Jump Bar Jump Weave Poles Tire Jump Balance Beam Hoop Jump Closed Tunnel Bar Jump A Frame
Depending of course on what type and how many pieces of equipment you own. The idea being to "mix it up", not to have Jump, Jump, Jump, Jump, Jump, Jump.... but to mix in other pieces of equipment. Agility is one of the BEST Spectators Sports. Mixing up your equipment not only keeps it fun for the competitors, human and animals, but also those watching.
How many pieces of Agility Equipment on your course will also be dictated by the age and ability of the cat you are training....Mrs. Dillon, pictured here, is just beginning to learn. So three pieces of Agility Equipment is plenty for her. Also note, there is not a lot of training room, setting up room, on the table I am using.
One more thing about the Agility Course. Make sure your area is relatively flat, without holes, no large rocks, preferably fenced, and uncluttered. this makes the course not only safer for animals....but also the humans.
If you look close at the Agility Course in the distance photo you can see our "Grounds Keepers"... goats, llamas, horses, ponies and a donkey. In the photo you can see, if you really look, three of our llamas grazing.
If your cat does not seem to want the treats you are offering for doing tasks, try toys, fun toys, toys with feathers. Use these/this toy(s) only when training. Use the toys to lure Kitty into "good behavior", then let Kitty play with the toy for a short time after the training section.
BUILDING/MAKING/CRAFT YOUR OWN CAT AGILITY EQUIPMENT DIY PROJECTS
Many moons ago I started thinking about training some of your dogs to do Agility. Deron starting building me Agility Equipment to Standard for the Sport. When I started training a few of our goats to Agility on the Dog Equipment, Deron build more, and better equipment for goats. When I said I wanted to train some of my pet ratties (fancy rats) Deron started doing the math...to make sure that the sizes were right. And of course, when I said Rabbit Agility, he was building again.
Don't fret if you do not have a builder. There is much anyone can make. Just remember that SIZE MATTERS!
Most Rabbit and Small Dog, called Mighty Agility Dogs Equipment is the right size for cats.
NOTE: DIFFERENT CAT CLUBS HAVE DIFFERENT RULES AND REGULATIONS FOR THE SIZES AND STANDARDS FOR THE CAT AGILITY EQUIPMENT THAT THEY USE ON THEIR COMPETITIVE COURSES. LOOK UP THE SPECIFIC CLUB YOU WILL BE COMPETING WITH FOR THEIR INFORMATION. I have to add, I do not agree with some of the Regulations that are now set with some of the Clubs.
THE STANDARDS BELOW ARE SOME THAT WE SET AFTER SPENDING YEEEEARS WORKING WITH MANY SPECIES OF ANIMALS ON MANY AGILITY COURSES. WE ALSO HAVE WORKED WITH CATS FOR MANY YEARS AND KNOW THE LENGTH OF THEIR STRIDES AND HOW THEY "MOVE WHEN THEY WORK".
Building To Standard and Building For Back Yard Training
First and Foremost you NEED to build your Agility Items/Equipment sturdy and safe. You want Kitty to trust you, not fall or get shook and never want to play these games again.
Keep in mind that even though you are "just playing at home" you might want to keep your Agility Equipment as close to Standard Sizes for the Sport as you can. You never know what the future might hold. Plus. The Standards were made for a reason. The reason is, that is the size that is best for Kitty (or whatever animal), the most comfortable for body positioning when using, the most safe to use, the most practical.
If your cat does well and YOU are excited about the sport YOU will be the one people ask to help them train their cats. You might even start a Club or Group that meets with their animals...
And I can not say it enough....SIZE OF YOUR EQUIPMENT MATTERS! Horse Agility Equipment (yes, that's me in the photo) will not be suitable for Cats. Cat Agility Equipment should be made the size that Cats Need.
DIY Building Your Own Cat Agility Open Tunnel
How big should your Open Tunnel be? Start with a small Tunnel, work your way up.
For a "Real Course", for Cat Agility Competition, The Tunnels should have approx. 12" to 18" diameter opening and be at least 4' long, up to 8'.
But for training, for at home, for fun, for showing off your cat's new sport, about anything will do that has an opening of at least 10" for an average sized cat. Larger Cats should have something taller.
Deron took an old thrown out small barrel and cut the top and bottom off, see photo above. I took it from there, cleaned it up real good then added Duct Tape, starting at the opening, half way in, tripled (so that there are no sharp edges, then taped the whole barrel. I cut out reflective rabbit shapes and added them for fun and decor.
This Barrel, now Open Tunnel, works great for training small dogs, puppies, cats, rabbits and ferrets.
Cat Agility Closed Tunnel
If you are going to sew your own Cat Agility Equipment Piece, that is DIY, you will need to decide the size of Closed Tunnel you are going to make for your cat(s), the color or print you might want for the project, and what you will use for a very hard sided opening for the Tunnel.
I might suggest, rolled wire (that is what I will use), make your tunnel to the size of a cardboard box you can easily bring home in the same sizes each time and cut about 8" - 12" long to hold the open open, or a stiff end with very stiff fabrics. You might find some sort of piece of plastic you could cut to size and sew into the open end of the Closed Tunnel that would hold it open for safe and stable entry. Also. A round barrel end could be cut and used, you probably want to sand each end after cutting so that it does not cut your fabric during use or when folded up for storage.
After you decide the size of Closed Tunnel you are going to make buy your fabrics accordingly.
Remember, you will want enough fabric for the opening end of the Tunnel, so do the math. I am going to have an approx. 12" round opening, so I am going to use approx (12 x 3.14) 38" - 40" wide piece of fabric. My Closed Tunnel is going to be approx. 45" long. So I bought 1 1/4 yards of cute cat print fabric and the same in a complimentary colored polar fleece. I will line my Tunnel, for stabilization, using the polar fleece.
To Create and Sew a Closed Cat Agility Tunnel you will need:
Sewing Machine, thread and a Plan, for sizing and the opening Fabric, and the same size Fabric to line your tunnel for stability Bias Tape or Cord for tying the tunnel into a ring when not in use and: The all important whatever you chose to use for your Opening
Double check all of your math and cut your fabric. Do not forget that seams and your Opening Item will take up some of the inches you have decided on.
Sew your liner to your outside fabric with their right sides together, leaving, the closed side, the end where the cat will come out of, open for turning fabrics right sides out, and to add your opening piece into the inside of the tunnel.
Sew at least two pieces of bias tape or cord to the bottom, the closed side, on the outside of your tunnel, so that it will not distract Kitty, and so that the Tunnel will fold and tie and store easily. Make your pieces of ties as long as they need to be to go around all of the fabrics you are using PLUS your open end piece. Fold your ties in half, that is where you will put your seam...in the fold where you are holding the ties in half, short ways so that they dangle and are ready for use. Sew these ties on tightly, that is, go back over the seams several times each.
much more information and photos to come...
Building Your Own DIY Bar Jumps for Cats, Small Dogs, Ferrets, Rabbits and...
Building Your Own Teeter Totter (Sea Saw) for Kitty Agility
The Teeter Totter for Cat Agility should be approx 48" (4') long, 6" wide and have a 4" to 6" pivot point.
The top board should be one piece. That piece should be at least 3/4" thick so that usage and storage and moving it will not warp it.
Your pivot could be PVC Pipe, glued tightly to the, Just Off Center, of the top board, or a small piece of round wood, think tree branch, cut, debarked and also glued tightly to the top piece.
Building A Tire Jump for Cat Agility
Making A Hoop Jump For Your Cat's Back Yard Agility Course
Hoop Jumps are different than a Tire or Window Jump....but not by much. The training is basically the same, the build and look is different.
more to come
How To Make A Window Jump For Cat Agility
If you make your Window Jumps right, the main board will turn over and you can use this jump at two different heights.
more to come
Kitten or Beginner Cat Agility Jumps
These are my $2 Kitten/Beginners Cat Agility Jumps. I bought the, 2 in a set, Baskets at the Dollar Tree (boy they owe me for all the commercials!) And the 4' Wooden Dowel cut in half for the cross pieces for .98 at the Hardware Store.
With Scissors I cut the squares larger, where my fingernails are pointing, for the dowel to set into.
With a Hand Saw I cut the Wooden Dowels in half.
You could paint the wooden dowels if you wanted to. The Baskets come in several different colors too.
For Beginner Cats, or if you have more room than I do, you could use the Wooden Dowels at the full 4' if you like.
As you can see these little, inexpensive Cat Agility DIY Jumps work GREAT!
What To Use For Weave Poles For Cat Agility Training
For Competition the Course needs to have a Minimum of 5 Weave Poles set approx 18" to 30" apart. Any closer and it is not easy for the cats to wind around.
Weave Poles need to be at least 12" tall and no bigger around/diameter than 5" each. Cones however work well even if fatter than Poles. However, cones larger or shorter than 18" would not be the best for Cat use. 18" cones are tall enough for cats to define, and the bases on 18" are not so wide that as the cat Weaves, you loose site of it.
We use "wooden dowels" for our cats Agility Courses. 1/2" diameter by 3' tall, and they are painted BRIGHT colors. When using 'poles without bases' each one needs to be "seated" in the ground at least 8" so that if they are hit by your body or the cat's body, they stand, but there is some 'give'. Paint them bright so that no one, including you or animals, accidentally runs into them and trips or falls on or with them. Fatter dowels could be used, thinner is not recommended.
There are many items like the wooden dowel that could be used. With stands or not. Just make sure that they item sticking out of the ground/floor is safe and not sharp.
We use 6 Weave Poles. Once your cat has learned the Weave Poles you can set up as many as you would like. There are Dog Events where all they do is race to Weave many poles set up in a row. Their event is set up "dog against dog", that is there are two side by side Weave Poles Courses and the two dogs "go" at the same time. Fastest dog goes on to compete against other winners. There is not reason this fun event could not be set up for cats.
MAKING WEAVE POLE STANDS
If you train Kitty indoors you will need Weave Pole Stands. It is not like you can stick the Poles into your floors.
I am sure you have seen the PVC Piping that holds Weave Poles within. If you make a set of these MAKE SURE THE BASE IS STURDY! Without a base, the PVC Pipping with poles sticking out is 'an accident waiting to happen'.
Before you jump in and make your Weave Poles as a group, think about several things...
Is this set of Weave Poles going to be used for Kitty only? Or do you have other species of animals that you might be working with? This could change how far apart you want to set your Weave Poles in the base.
Where will you store this set? Is this piece of Agility Equipment going to be able to be set up in your Agility area at all times? Or will you need to take these items apart for storage? That will matter on how you build the set.
How many Weave Poles do you want in your row? You might need to build your set so that it can be added unto or taken away from. Less for training, more for after your animals are weaving well.
Personally. I prefer individual Weave Poles that can be stored easily, with little room, and added to or taken from quick and easy.
One way to achieve both ideas is a base with holes that are each the size of the poles you will be using that can have or not have a 'full boat', that is, you can set as many poles into the holes on the base as you like, or not. Keep in mind, your base will still need 'legs' (flat on the ground) for stability. Or the base could be dug in, just a small trench, for stability and to make the base flat to the ground surface.
Ask yourself not only how often you will use the equipment you are using and how you will set it up? Where will you store the equipment, if you take it down, and how often will you set it up? Will you be transporting the equipment and how?
There are 'cheap and easy' ways to have a LOT of fun with Agility. Just make sure that 'cheap and easy' are ALWAYS made stable and safe for human and animals.
Traffic Cones for Weave Polls
Traffic Cones can and will make GREAT Weave Polls for any species of animals. Traffic Cones come in several sizes and colors.
Cones are also a good training starter as the cat will be able to see and understand the size, thickness, of the cone and what you are asking better than a skinny stick out of the ground.
ideas, information, measurements and photos coming soon
Building A Sturdy Balance Beam for Cat Agility
A Cat Balance Beam should be approx. 3' to 4' tall. It should be approx. 6' long. The 'walking board' should be approx. 3" - 6" wide with a non slip surface for the cat to walk on. The legs should be wide enough to make the Balance Beam very sturdy for cats jumping onto and off of the Balance Beam. The feet of the Balance Beam should be non slip.
For Advanced Cats and Advanced Cat Agility Classes, a taller, longer, more narrow, Balance Beam could be used. However, for the average cat, running along an Agility Course, a Stable, more wide Balance Beam is safer and less intimidating for the cats using it.
more to come
Kitty A-Frame
I have seen Cats in Competition, set up by Cat Clubs, people who are suppose to know about the sport, using these tiny A Frames and I am wondering (as I roll my eyes)... "Why?"
Cat/Animal Agility A-Frames need to be big enough for the cat/any animal using them to climb up one side, many times coming in to it from a run, and walk or run down the other.
It needs to be large enough so that kitty's body is NOT half way up while the other half of the body is half way down. The cross pieces, where Kitty walks the board, on the A-Frames I saw in Cat Agility Competition were so close and stuck out so far, that they interrupted the cat's strides, and disrupt Kitty's paws, of the cats that were using it. And the danged A-Frames were so narrow I thought they might tip over as the cats were at the top, again, with half their bodies up and half down...
Did the builders, who I am sure who had 'good intentions' do any 'homework on agility training and equipment' before building these unsafe pieces????
An A-Frame should be wide enough for the cat's body but not so wide a lion could walk it. It should be tall enough for the cat's full body to be a ways off the ground/floor. It should have a non slip surface for footing, but not so many cross pieces, too close together, that they interrupt the natural movement of the cat's normal stride.
An A-Frame for Cat Agility should have each side walking boards approx. 48" long, 18" wide, and with a 45 degree angle. The walking boards should have a non slip surface. Cross Pieces are fine, that is small flat boards screwed onto the walking boards, but need to be placed no closer than 8" to 12" apart. Cross Pieces are to stop slipping, not to become part of the footing.
Cross Pieces for non slip footing should cut to the same size as the width of the walking boards but be no wider (that is stick out from the board) than 1/4", 1/8" would be better as it would not interrupt stride. They are to catch slipping feet, not used for steps.
The A-Frame needs to be stable. Very Stable. If it is a permanent piece of equipment in your agility area, cross sections of wood or PVC should be attached at the bottom so that it is always open at the same angle with the ability to hold approx 30 pounds. Always make it a bit stronger than you think you will need.
If your A-Frame is portable, and folds, it will need hinges at the point where the walking boards meet. It will also need attachments to hold the frames firmly together as it is walked, run on and jumped on and off of.
If painted the last 12" from the bottom upwards, should be painted a different color than that rest of the A-Frame. This is to make sure, from a distance, that the cat has touched the A-Frame in the proper manner, going up and going down the piece of equipment. This is why you see the yellow and blue pieces of equipment so frequently.
Building The Cat Pedestal or Pause Table or Pause Box DIY
Here is going to be where size, that is the size of this piece of Agility Equipment will be differences of opinion. And What Are You Building? A Pedestal or a Pause Table. They can be 'one in the same' and they can be very different pieces of equipment....depending on what you are using it for.
The Pedestal
A Pedestal is to most folks the "Tada!" piece of equipment. Where an animal goes and sits after performing a trick. Where they 'Sit' and 'Sit Up' and 'Sit Up and Give a High Five'.
A Pedestal could be the same 20" x 20" as a Pause Table and used for both. However, it can also be more of a taller 'stool' with a smaller area for the cat to sit on. Making the Pedestal looking like a bigger deal than just a 'chair'.
However you make your Pedestal it NEEDS TO BE VERY STURDY! Your cat is going to be taking a big jump to get onto it. The legs need to be tilted out for more stability when the cat comes in from a run with a flying leap to get up onto it and or jumps off the stool with the same enthusiasm.
If you buy a 'bar stool' (check resale shops) you will need to reinforce it if it is not very stable. If the top of the stool is wooden or plastic, you might want to add fabric so that Kitty does not fly off the side as it comes in for a land.
The Pause Table
A Pause Table can be a simple as a piece of wood, or even cardboard cut to size, approx 20" x 20" square, or a piece that is the same size on legs that are approx. 8" tall. Standard would need the legs.
Plywood cut to size then painted with an inset 1" x 1" frame on the underside, set upon 2" x 4" legs cut to 8" each would work wonderful! These can be decorated or just painted one color.
The Pause Box
A Pause Box is an area, marked on the ground, where the cat is suppose to go into, sit down and 'pause'.
We use a square of PVC Piping. It is easy to move about, to store, and for Kitty to understand.
The Pause Box for a cat should be approx. 24" x 24" so that Kitty's tail is mostly, if not all the way, into the box.
Pause Boxes could also be make of wood, painted to match the rest of the equipment, as long as it is still very bright and can be seen easily by cat and human from a distance.
Training and Trick Pedestals
We have a very small house. I bought two plastic 5 gallon buckets and two non-slip lids. The lids are padded and fabric. These work very well, with weight inside them, for training Kitty on and off of, as well as having Kitty jump between and doing tricks on top of.
Inside the buckets, I store my cat items. I have my grooming supplies, extra or new not yet given toys, other agility items, and such inside. This adds weight and stablity to the bucket, and is a great place to keep all these items together and handy...and out of the way.
MANNERS AND OTHER BEHAVIORS YOUR KITTEN/CAT SHOULD LEARN
Cats need to be Mannered. I have said it before and will say it over and over and over... You ARE training your cat, even if you do not know it. The way you act and react towards them, your body language, your words. They are picking up on it all. So you might as well train them to be pleasant members of your family...even if it is 'just you and Kitty'. This is training that you can do as you interact with Kitty. Just everyday, be consistent, interacting.
"No"
Teaching "No" is a natural progression when training an animal. As you continue to work with them they catch on to "no". Be sure you make yourself clear when training your animals. When you say "no", do not change your mind, do not give a treat to the animal, do not smile, do not move (unless you need to move the animal), do not laugh (OK, try really hard not to). Animals quickly catch on to our body laughing. Laughing = Happy. Just like the human child that gets a laugh for bad behavior, they and animals too, will repeat that bad behavior because you showed it made you happy. When you tell your GP "no" make it mean "do not do that" if you need to move the Kitten/Cat away from what it is doing.
"Off"
For cats, the most important thing for them to learn. You do not want your kitty on your dinner table or counter while you are cooking....
Use the word OFF not DOWN. Why? Down means to "lay down". Off means to move yourself from items. Couch, Bed, Table, Banister, whatever.
Teach this right away when kitty comes home.
AND NEVER, LET YOUR CAT WHERE YOU DO NOT WANT IT. What I mean is, if it is not alright for the cat to be on your kitchen table, NEVER let it on the kitchen table. Your cat will understand better if the Rules Are Clear.
When teaching this. Move your kitty off whatever it is that the cat gets onto that you do not want it on, as you say, FIRMLY, "Off.". Not "Get Off", just "Off". Remember when training animals, one word descriptions are understood better than a line of words.
"Out!"
We use the word "Out!" for our cats when we want them out of a place they should not be. If you use the word, just the word with their names, not clattering on, just "KITTY OUT!", and move your cat. Set them down. Do NOT pet them, or make any other fuss. Just say it, move them, walk away. If they go back, same thing.
If Kitty is stubborn about it there is a horse training task you can use. To teach a horse to load into a trailer, a calm horse that is just standing there with it's feet like in concrete, use the 'tap method'. Let me stop here and remind people, THIS IS NOT SPANKING! This is not a whopen'. It is an annoyance that the animal moves away from into the area you want it to be. To the animal, this is like a bug landing on their rear, an annoyance, over and over and over and over...
The tap. Using the handle end of a Fly Swatter, or the like, gently, seriously, gently works best, tap the rear end of the animal toward the out of the situation, as you say, "Out." Repeat the word several times as you gently tap.
When the cat is out of the area, say, "Goooood Kitty (your cat's name)!" in a very nice tone, and you walk away.
It will NOT take long at all for your cat to move...and if you are consistent, you will only have to do this three, maybe four, times and your cat will move quickly out of the area it is in when you say, "Out."
"Wait"
"Wait" can also be "Stay" and yes, not only can your felines learn this, mine know it. It will not only come in handy to keep your cat safe, but when you are setting up trick props they need to know to stay back and leave it alone until told. It will also keep them safe, if working on a table, when you are setting up and not looking directly at them; so that kittens they do not fall off the table.
The way I taught (I use the word "wait") it to put my hand between them and where they might want to go saying the word "wait". If they move, I set them right back where they were when I told them to "wait". I was amazed how quickly they caught on to this command.
Be Consistent and say "Off.", as often as you need to, moving kitty as you say it.
"Back Up"
Another one of those commands that might save your cat's/kitten's life, but will at least help when you are working with them and they keep coming forward toward you. I taught this by telling them "Back Up" then picking them up and setting them where they were. Then I started using the back of my hand and GENTLY and slowly pushing them backwards. Soon, all I had to do was move my hand toward them and give the command "Back Up". Remember, this is not a hurtful, back handed shove. When working with animals use a gentle, guiding, easy hand. But always make sure you follow through.
"Dinner!"
This is so easy! Say, "Dinner!", every time just before you set your cat's meal down on the surface you serve it.
"Here Kitty Kitty"
When you call your Kitty, use this, "Here Kitty, Kitty." Feed them when they arrive.
If your cat does not come when you call the "Here Kitty Kitty.", go get the cat, and make a fuss over it, and give the Kitty a treat or meal.
"Outdoors"/"Inside"
Every time your cat goes out the door, say, "Outdoors". Or ask, "Do you want to go outdoors?".
Every time you bring your cat inside, say it. "Let's go inside."
TEACHING ANIMALS YOUR LANGUAGE
You might be very surprised how very quickly your cat will learn these words. the trick to teach your animals words, is to use only the word with the task. Not to keep talking on and on with all sorts of other words. KEEP IT VERY SIMPLE!
THERE ARE CAT TRAINING BOOKS ~ Buy One or Seven
While they are not as popular as Dog Training Books there are Cat Training Books to be found.
I have a couple of Cat Trick Training Books. I like the old books, all that PC stuff is so irritating and unnecessary in training books. I buy my Cat Books while shopping on line. You may have a Pet or Book Store near you. The Books that I have are;
Ray Berwick's Complete Guide to Training your Cat Teaching Your Cat Simple Tricks by Arden Moore Friskies Training Your Cat by Scott Hart
I also have a Pet Training Book (somewhere by Ray Berwick (he trained Baretta's bird) that has a Cat Section in it. I bought that one for a Quarter at a Garage Sale...another of my favorite shopping places. I recently bought the one here in the photo on line. Ray is one of the BEST no nonsense trainers there ever was!
I like to read all sorts of animal training books. Many times I find ideas that help me to reach an animal that I seem to be having trouble with...reading several different books, several different methods, is like a refresher course for even experienced trainers.
More Information and Ideas Below, but I wanted to INVITE YOU to Join Us At:
I have hosted a Cat Tricks Yahoo Group on Yahoo for many years. I hope YOU will join us there and tell us all about YOUR kitties and cats!
CAT CRAFTS
Ideas, Information and Patterns for making ~ DIY ~ your own Cat, Feline, Kitty, Kitten Toys and Other Cat Items. Some Items Will Take Less Than 1/2 Hour! ~ Some, Only Minutes!
Cat Cue Stick ~ Feathered Teaser Stick ~ Cue Stick with Treat Cup
Cat Feathered Teaser Stick
You Need: A thin wooden dowel saw and sand paper you might want to paint your wooden dowel Some Feathers needle and thread duck or electrical tape a short cord or piece of rope, however long you would like for it to be if you like, add a small bell or two
Cut your wooden dowel to the size you would like to use for your own cat. Paint or not.
Sew the feathers to one the end of cord, if you do not sew, just tape well, but the feathers will come out easier when Kitty plays with it.
Tape the other end of the cord to the wooden dowel.
Cue Stick/Wand with Treat Cup
You will need:
Wooden Dowel or the other half if you cut your dowel in half for a Feather Teaser Saw and Sandpaper Paint Small Scoop from coffee or the like or Spoon Duct Tap
Cut a wooden dowel to approx 18" (1' - 2' is fine) Sand paper the end where you made the cut Paint to desired color or leave as is...let dry. Using Duct Tape, and it comes in so many colors and prints now, tape your scoop or spoon on one end.
These type of Cue Sticks are really good for setting a treat, or scoop of canned cat food inside of, to teach your cat to follow the Cue Stick and get it's treat as soon as it gets to where you have asked it to be. Really good for Agility Training.
Fleece Toy
These are so easy to make and so enjoyed by cats and kittens!
But good/thick Polar Fleece. You do not need much. If you know someone working on a Fleece project, ask for the scraps. Scraps can be cut into strips in a circle and work very well.
more to come...
Stuffed Kitty Toy with or without Cat Nip
You Will Need:
Small Pieces of Fabric approx 5" x 4", but any scraps will do...and if you are setting up the sewing machine, make more than one of these and put some of the extra finished toys up for another "new toy day". Think Holiday Prints and think of friend's cats that might like a little toy too. Stuffer...could be cotton balls, batting or stuffing from craft stores. Crinkle Noise, think the inside of the box wax paper from crackers. Wash, of course. A Few Feathers. Our birds moult here so we have many A sewing machine or needle and thread. Bell for inside or not Cat Nip for inside or not
Turn the little piece of fabric, right sides together and make one stitch down the 'long' side of your fabric piece. Turn inside right.
Roll one end, about 1/2" to 1" down from the edge, stick your feathers into the area you will stitch so that the feathers will stick out as 'teasters'. Sew tight.
Stuff whatever you are putting into your toy. Cotton, crinkle, bell, catnip, crinkle, cotton. You want each end of your toy craft to have a soft stuffing.
Twist and add feathers to that end and sew shut.....easy!
Give this to your cat and watch it LOVE your crafting!
Pool Noodle Cat Toys
Pool Noodles are not only good for the Pool, they are GREAT for Crafts. I bought mine at the Dollar Store and use them for all sorts of things...see faroutliving.com for Pool Noodle Craft Ideas.
This one I cut into little sections. Once of these will be given as is to Mrs. Dillion to bat around. The others will be strung into a strip of Polar Fleece for a bigger toy. These, strung, can also be hung from chairs or crate fronts or such.
You could wash these strung toys in the washing machine with towels on cold. Hang to dry.
Cat Sweaters
Cat Sweaters should fit Kitty snug, other wise a cat will 'step' or 'roll' out of it, worse, could get caught inside of it.
In the photos here you can see Mrs. Dillon wearing a sweater I made for my Guinea Pigs...it fits her for now. I will, of course, need to make her a larger one as she grows.
You will need to measure your cat before starting your sweater, and because you are making Kitty a Custom Sweater, you really need to have a bit of experience with either knitting or crochet. If you knit, you need knitting needles of the size you have decided to use for the size of stitch you want for your Cat's Sweater. If you crochet, same thing, choose the size of crotchet hook you want to use.
Depending on the type of stitching and size of your stitches, you will only need one or two at the most, skeins of yarn. Buy two if you want contrasting, or three if you are doing some sort of pattern that calls for it.
Teach your cat to wear clothing so that it is comfortable in them.
I LOVE veragated yarn. It is not only pretty to look at, but hides a lot of errors that can be made as a person knits or crochets along. It also comes in so many seasonal and holiday colors.
Once your cat is comfortable wearing Clothes, it will be able to do the little things you teach it while wearing them, adding 'the cuteness factor' to every little thing it does.
KITTEN SWEATER - CROCHETED
This little sweater will only take an hour or so. I used an H hook and Mexican Rainbow colored variegated medium weight yarn.
Chain 7 Make a cuff by single stitching into the front one piece of yarn in each stitch. Chain one and continue this for approx. 7". Slip stitch your two ends together and turn inside out. If you turn your sweater and the yarn is coming up from under the neck cuff, turn the cuff back to the original position and flip the other direction.
Slip stitch four stitches away from the middle of the cuff (where the seam is. Chain one and do a 1 1/2 stitch all around until the last eight. You will be four stitches from the seam of the cuff. Chain one and turn, you will put in an additional 6 rows of this length. On the 7th row when you get to the end of the sweater body, chain 25 (this will be your belly band. For the next five rows you will be making your belly band as you add to the sweater. The next two rows will end equal to the front of the sweater before the belly band was added. Decrease a stitch in either end of the next to rows. Decrease twice end each end of the next three rows Tie off and tuck extra yarn Add a button on the outside of the belly band so that when buttoned the band tucks under the sweater against the Kitten's body. The button will add adaptability to the sweater.
Put on your kitten and enjoy....be sure to get a photo!
Your new sweater is of course machine or hand washable. I hang mine to dry.
To continue to use this pattern as your kitten grows, use a larger Crochet Hook and or add stitches...
We also sell these sweaters in our on line store.
CAT SWEATER ~ Crocheted
This is a pattern that I reworked for a Cat Body....but measure your cat and make any adjustments you need to make as you create your own Cat's Sweater in the colors and type of Yarn you want to use. Using a larger Hook will make the item larger, using a smaller Hook will make it smaller. This pattern is NOT the one I used that you see in the photos here.
Your Will Need: Yarn: Approx 2 Skeins Crochet Hook: Size I Yarn needle
Gauge: 12 sts = 4”; 16 rows = 4” in pat. CHECK YOUR GAUGE. Use any size hook to obtain the gauge.
SPECIAL ABBREVIATIONS:
Lsc (Long Single Crochet) = Insert hook in st indicated one row below and draw loop through, yarn over and through 2 loops on hook. Skip st under Lsc. dec (decrease) = draw up a loop in next 2 sts, yo and draw through all 3 loops on hook.
PATTERN:
Row 1 (Wrong Side): With CB, ch 1, sc in first sc, * Lsc over next sc, sc in next sc; rep from * across; turn. Row 2: Ch 1, sc in each st across changing to CA in last st; turn. Row 3: With CA , rep Row 1. Row 4: Rep Row 2 changing to CB in last st. Rep Rows 1-4 for pat.
NECKBAND: With CB, ch 6.
Row 1 (Right Side): Sc in 2nd ch from hook and in each ch across; turn – 5 sts. Row 2: Ch 1, sc in back lp of each sc across; turn. Rep Row 2 until 29 rows in all have been worked, changing to CA in last sc of last row. Fasten off CB.
BODY- Row 1 (Right Side): Working across long edge, ch 1, sc in each row end across; turn – 29 sc.
Row 2: Ch 1, work 1 (2, 1) sc in first sc, * 2 sc in next sc, sc in next sc; rep from * across – 43 sc. Row 3: Ch 1, sc in each sc across, changing to CB in last st; turn. Now work in pat for 2 rows.
Divide for Leg Openings- Row 1 (wrong Side): Keeping continuity of pat, work across first 5 sts; turn. Work even in pat on these sts for 9 more rows. Fasten off. With wrong side facing, skip next 3 sts of last long row for leg opening; join yarn and work in pat across next 27 sts for back for 10 rows. Fasten off. With wrong side facing, skip next 3 sts of last long row for 2nd leg opening; join yarn and work in pat across last 5 sts for 10 rows. Do NOT fasten off. Next Row- Join Underbody: Work in pat across first 5 sts, ch 3, work across next 27 sts, ch 3, work across last 5 sts; turn.
Next Row: Work in pat across first 5 sts, sc in next 3 ch, work across next 27 sts, sc in next 3 ch, work across last 5 sts; turn – 43 sts. Work 1 row even in pat
Shape Back: Keeping continuity of pat, dec 1 st each end of next row, then every other row 13 times – 15 sts. Fasten off.
Leg Openings-Rnd 1: With right side facing, attach CB in any st at leg opening; ch 1, sc evenly around; join with a sl st in first sc.
Rnd 2: Ch 1, sc in same st, * dec, sc in next st; rep from * around, adjusting at end of rnd as necessary; join. Rnd 3: Ch 1, sc in each sc around; join. Rnds 4 and 5: Rep Rnds 2 and 3. Rnd 6: Ch 1, working from LEFT to RIGHT, work 1 rnd Reverse sc. Fasten off.
FINISHING: Sew underbody seam from Neckband to the first shaping row of Back.
Edging: With right side facing, join CB in seam; ch 1, sc evenly around entire edge working 3 sc in corners; join to first sc. Next Rnd: Ch 1, working from LEFT to RIGHT, work 1 rnd Reverse sc. Fasten off. Weave in ends.
Kitty Hammock
First you will have to decide where you will be hanging this Hammock you want to make for your Cat. That might help you decide on the size; that and how large your cat is, or is going to be.
You will need two layers of fabric. It is nice to make one side either, fake fur or polar fleece. You will also need a thicker Bias Tape. This will hold the two fabrics together and be your ties at the corners.
Your Bias Tape needs to be cut to approx 12" each. You will need 4 pieces, one for each corner.
I sewed my bias tape into each corner so that it kind of 'rounded off' the corners for hanging. You could, if you like, tuck the bias tape into your corners as you sew the two pieces of fabric together. When it is turned outside right, the taps will be there to tie unto the area you want your Kitty Hammock hung.
Cat Bed ~ Stuffed
Feather Toy
Cat Treasure Box
This is a fun and easy craft to make a toy that Kitty will LOVE! A Cat Treasure Box.
Your Will Need:
One any size storage box/container, I used a Shoe Sized Storage Box Something small and round to trace, I used an aspirin bottle A very shape knife or razor something to cut on...such as wood sandpaper in a very fine grit or nail file a few Kitty Toys a few Cat Treats Maybe a little Cat Nip
Take the lid off your storage box and trace a couple of holes that are big enough for Kitty's hands, but not Kitty's face. Place these anywhere on the top of the lid you would like, you may even put some into the sides of the box too, and add as many or as few holes as you would like.
Cut the holes out. Sand the holes is they are sharp with a nail file or sandpaper.
Place a couple of Cat Toys, a few Cat Treats, Cat Nip if you like, into the box. Put the lid on the container and make sure the lid fits tight.
Show it to Kitty and give it a whirl, or shake, so that the items move about. Set the box in front of Kitty and watch the fun.
Cat Scratching Post
Fabric Cat Sack/Bag Bed
Cats LOVE these Fabric Sacks! You will be able to pick out your favorite, cute kitty print or furniture matching fabrics for your own cat's Bed Bag.
For the one I show in these photos, I used scrap fabric I had around. And the whole craft, start to finish, only took me 20 minutes.
You will need:
approx. 1/2 yard of fabric the same amount of fabric for the liner, you could use; Polar Fleece, Fake Fur, or just another cotton blend in a matching or contrasting print. Scissors Thread Sewing Machine
These are so easy to sew and fun to make and you will enjoy seeing your kitty playing and sleeping inside the bed your crafted for it.
Cut your outer fabric to approx 45" x 18". Fold over, right sides together. Sew up both sides, leaving the top open, sew this with the right sides together.
At the bottom of each side where the seams meet the bottom, turn your piece and sew a "box stitch" or "bottom" or "gusset" into each side. Make about a 6" seam.
Cut your inner fabric just the same, only about 1/4" smaller, so that it fits down into your outer side well. Sew it the same, but leave about 8" open on one of the sides, approx. 6" down.
Sew the two pieces together, right sides together, lining up the side seams.
Turn the piece, now sewn together, using the opening at the side of the inner piece. Tuck, Tuck, Tuck each corner as you set the inner side into the outer side of your bag.
Pull the side back out of the bag, just far enough to sew the seam down, after tucking the raw edges in. Make your seam. Tuck the bag back together. Fold your outside liner over the top about 4" and pull tight at the two sides to set snug.
Your new Bag Bed or Sack Toy is ready for kitty!
I made this one for some friends cats. Our friends bought new Indian Motorcycles the Summer I made this, and I thought this would be fun for them, all, cats and humans. I also sent the Motorcycle Cat Toys with the Indian Motorcycle print Cat Sack.
Hobbies, Holidays, or match your furniture...this Cat Sacks are fun.
Pedestal/Toy Box
A 5 Gallon Bucket with a Lid can become not only a Pedestal for tricks, but also a Toy Box for all those Kitty Toys.
Cover the inside of the lid with non-slip surface...a Yogo Mat cut to size would work great (just vacuum to clean hair out now and again). Cut your Yoga Mat to size then glue it down with a good glue that adheres to plastics. Let set 24 hours minimum.
Duck Tape comes in a variety of colors and prints, choose one and cover your bucket with it. You might want to match your other Trick Props or Agility Equipment.
Use this Pedestal for your cat to go to after a trick, to do tricks such as 'sit', 'shake', 'wave', 'spin' and more...
And when you are finished training or showing off your cat to others, pack up Kitty's 'stuff' inside the bucket and put the bucket in it's storage area, or where Kitty can get up on it and feel safe.
Be aware that Kitty Litter buckets normally have a more narrow bottom than their tops are. This will take away the stability of the bucket that Kitty is jumping up on and working on top of.
FREE CAT/KITTY/KITTEN AGILITY EQUIPMENT!
If you look around there are items you can find for FREE to use for Cat Agility. What are some of those items? Be Green! Recycle, Re-Purpose/Repupose, Reuse! If you live on a Farm or Ranch we all call it "Junk Around the Farm/Ranch".
Barrels
Car Wash Barrels; Even the 30 gallon barrels can be used. Look around at photo to gain ideas at how useful a Barrel can be. They can be used as is for some of the Agility Equipment and drilled to make other types.
Wood From Work Sites;
Many times when Public Places add on, or do some work around the buildings you might find perfectly good pieces of lumber in the trash cans. Ask first. Make sure the wood is good before removing it. Make sure it is large enough for what you want to use it for. You might also find Orange Fencing that could be used for one thing or another.
Old Tarps
Many times people have an Old Tarp laying around. Just make sure that if it has holes in it that a foot could get stuck inside of, you trim it down.
Logs and Branches
Logs and Branches can be used for Jumps, to Hold the Tarp.
Make sure these come off your own property or that you have permission to gather them.
If you are cutting these off YOUR OWN trees, make sure you know what you are doing. Keep it safe.
Old Hoses
Old Hoses can be cut and made into Hula Hoop Sized Hoops to Stand in. This could become your Pause Box.
Car, Truck and Bicycle Tires
Old Tires can be made for many things in Cat Agility Equipment. From Pedestals to Jumps to Stands for Equipment. You can dig them into the ground and use them, this way too, for Jumps, Weave Equipment, Tunnels and more...and you will not have a place for bugs to breed.
Tires can be fun and very useful. Just keep in mind that old tires, laid on the sides, hold water/rain and when the sun heats them this is where Mosquitoes and other insects like to lay there eggs.
Wooden Shipping Pallets
Far and Few Between there are some Wooden Pallets that, with work, would work for your Cat Agility. These are the Heavy Built, 2" x 4" new wood, or larger. Some are made heavy. Most are not.
Wooden Pallets, soooo much you can do with them, make with them, decorate with them. But for the average Wooden Pallet... you could take them apart and use the wood to build all types of Pieces Of Cat Agility Equipment.
However. That said. You could make an Arena/fenced in area with upright Wooden Pallets, it will take some work, and might now look that nice when you are finished, but you could use them for this.
Do NOT Steal Traffic Cones!
Traffic Cones are used in Construction Areas for the Public's Safety. DO NOT REMOVE THEM! Imagine how terrible you would feel if your own family member or friend were hurt or killed because you thought it would be alright to steal "a few cones" from the Roadway.
Even those Traffic Cones set off to the side of the road, when the work is completed, belong to someone else. They are NOT left there for people to Steal for their own use.
You can now easily and affordable buy Sports Cones.
CHEAP/INEXPENSIVE ANIMAL/CAT AGILITY EQUIPMENT
Dollar Store Pool Noodles Animal Agility Equipment
Hula Hoops
Did you know you can still purchase Hula Hoops, here in the USA that is, for $1 each? Yes. You can. Try the Dollar Tree. While you are there, look around. You might be surprised what you will find.
Pool Noodles
I bought my Pool Noodles when I was at the Dollar Store looking for something else. When I saw them, for $1 each, I bought them. They seem to sell very quickly, there is so much you can do with them, and I wanted to get them ALL in the Lime Green to match my Horse and other Agility Courses.
These can be used to make so many types of Animal Agility Equipment. Not only are these inexpensive, they are pretty safe to use with Animal, of any species, Agility Equipment as a foundation.
Fence Jumps
I bought these, inexpensively, at a large Hardware Store. They work well for cats or rabbits or puppies and small dogs, as well as ferrets.
You might want to by two of each Jump you would like to set up to make the Fence Jump wider so that your cat does not try to avoid going over and run right next to these jumps.
Holiday Themed Course Items
Have Fun and mark the Seasons with Holiday Items on your Agility Course. You can find inexpensive items at many stores, including, again, the Dollar Tree....no, I don't work there or own stock in the store.....I probably should.
Small Sports Cones
Small Sports Cones are better than NO Cones. Small Sports Cones can not only be used for Weaving, but also to mark areas.
Wood For Building
Many of the Hardware Stores have a place they put "not so perfect" wood pieces. Some large, some not. Many times they sell these for pennies on the dollar. There is no reason a lot of this wood could not be used to make Jumps or other Agility Equipment.
X-Inactivation Mosaicism ~ Split Face Color Cats ~ Bi Eyed Kittens
Our Kitty named Harlequin. I just love her markings.
This is nothing new. We have had Barn Cats with this Gene Factor for years. I wish we had taken more photos.
Now however, we give it a big name and go on and on about the Gene Factors. X-Inactivation Mosaicism.... if you read about it.... I am not sure they are even correct with this information. I have bred animals for over 50 years and...
much more information to come
This is my Barn Cat that does Agility. Her name is Lisa and she is our cat named Harlequin's sister. You can see the Harlequin Coat Pattern peeking through on her back and head, as well as her front legs.
This coat pattern is also, now, called Mosaic. I tried to get photos of Lisa so that you could see her back patterns too.
In Rabbits, or when 'setting genes' for any species, Lisa would be considered "good breeding stock". Lisa has a wonderful personality too.
In Rabbits, it is NOT uncommon, it is a Breed, called Harlequin. I used to breed them. Breeds come to be know through breeding like animals and related animals to one another until the Gene Factor is 'fixed', that is 'breeds true', that is, until the cats with these factors have babies that always have these Breed Traits. It takes many years and litters and time to 'set gene factors'.
more information to come, new page on this site
One of my Harlequin Rabbits was one of my BEST Agility Rabbit! Can you see him with the Tunnel?
much more to come
This Genetic Factor is becoming popular, here is proof.....cute purse I ordered on line.
Bi-Eyed Cats! (and other animals)
Deron and I LOVE Bi-Eyes. We have had many animals that have and have them. Bi-Eyed Cats are not as uncommon as some people think.
much more and more photos to come
Yes. That is a Llama with Bi-Eyes. And it is OUR Llama. Her name was Iva Boan and we trained her to pull a cart and to pack. You can see out llamas if you go to the Navigation on the left, www.workingllamas.com.
javascript:add('
','
')
That is a photo of a HAIRLESS DUMBO EAR BI EYE Pet Rat. Deron called Spirit, 'the triple threat'.
Deron and I have had more than just Spirit, as far as Ratties, with Bi-Eyed. Yes. THAT is still uncommon.
Deron and I met when we were Driving and Racing Sled Dogs. We have had many dogs with Bi-Eyes over the years. We had/have Seppala Siberian Huskies. Some breeds more than others, carry the bi-eyed geneticist trait.
The contents of this page for Cats is still under construction. Please check back again and again as we add information through the years.
CAT BREEDS ~ DO SOME BREEDS TAKE TO TRAINING BETTER THAN OTHERS?
I am often asked if one breed of cat or another is better for.... (fill in the blank)
Yes. And. No.
My answer is always "Work with the cat you own right now." The more time you spend with it, the more it will learn.
Let me say, I love pure bred animals, that is, when they are bred correctly. Are there "bad breeders in it for only the money?", of course there are. People are people and some people cheat at everything life has to offer.
But. There are far more "Good Breeders in it for the love of the animals, that are taking the time it takes to breed the animals that meet the Standards written for that particular Breed."
These people, Good Breeders, are not making a lot of money, even though price tags look as though they are. These people have a lot of money tied up in their animals, their care, their paper work, and these folks are not breeding their animals every time they come in heat.
Are some Cat Breeds better than others at some tasks and tricks.
Yes. But PLEASE, before buying a Savannah because the breed as a whole, jumps high, or fetches and walk on leashes (WHEN TRAINED PROPERLY) learn ALL about the breed and it's requirements.
Before you buy a Persian because you love the face expression, PLEASE learn about the grooming requirements....note the words grooming requirements, not grooming options.
Before you purchase a Maine Coon Cat because you love the size and long coat, learn about the breed and think about how much they eat and how much will be left in the kitty litter box....yes, some people have given up their cats because of these factors.
Before you buy a Siamese because you like their markings, learn how the breed as a whole is pretty demanding of their owners time.
If you decide you might want a Russian Blue, read about how they are fixed on their humans and most demand their owners time.
Before you buy a Bengal for it's eyes and or coat markings, learn about how the F Factor matters in the kitten you purchase. You don't know what an F Factor is? Maybe a Bengal or Savannah is not the cat breed for you.
My point: All cat breeds have, overall, their looks and requirements and characteristics. Too many good kitties have landed in 'pounds' because the owners did not research the breed before taking one home. The owner did not spend the time it takes to train the kitty. And. Believe it or not. Some people still believe that if they buy the same breed someone else has spent time with, trained, worked with, somehow, if they buy that same breed...it will come to them knowing all the things they saw that other cat of the same breed doing...
DO YOUR RESEARCH BEFORE BRINGING HOME ANY TYPE OF ANIMAL. LEARN ALL ABOUT THE TRAITS FOR IT'S BREED OR EVEN BREEDS. A barn cat can look just like a Siamese and act just like a wound up cat of another breed entirely...and keep in mind, barn cats are wonderful!
-- The Marna's Menagerie Team Wed, 21 Apr 2010 11:42:32 -0400


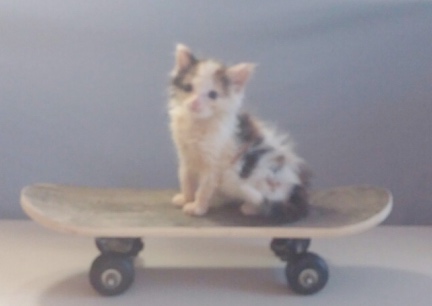
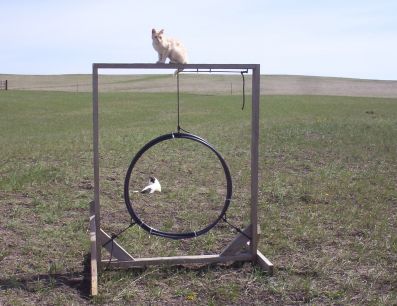
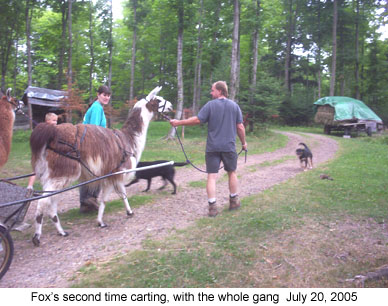
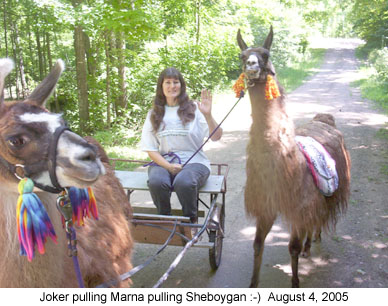
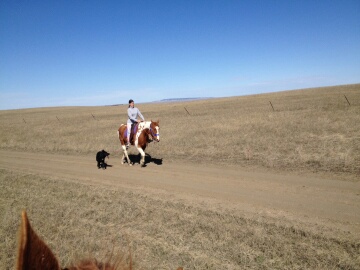
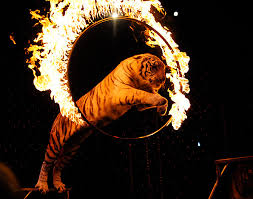
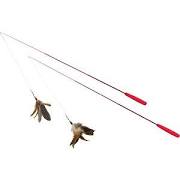
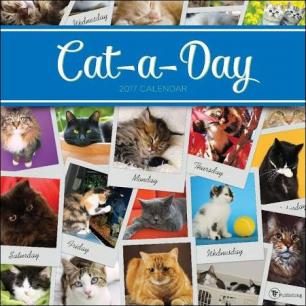
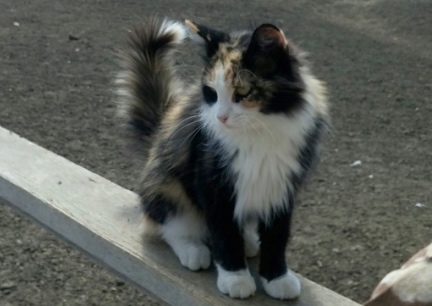
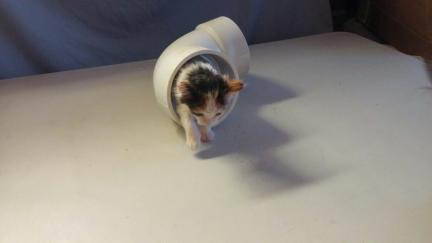
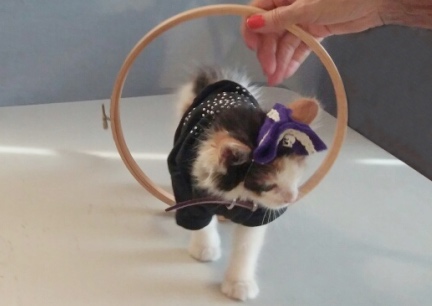
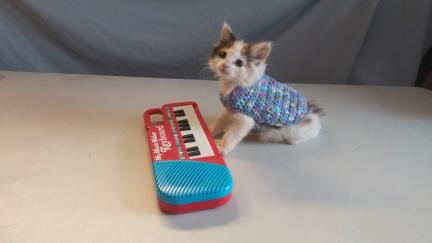
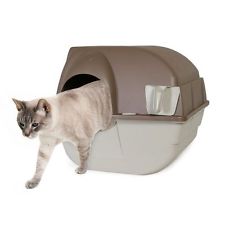
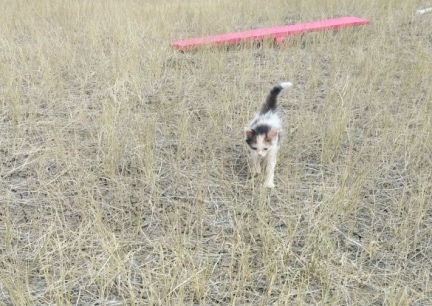
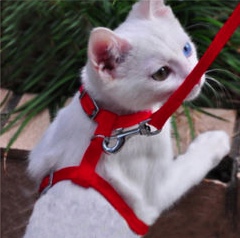
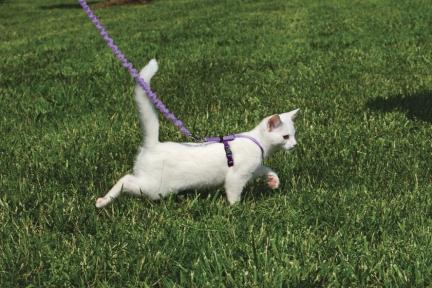
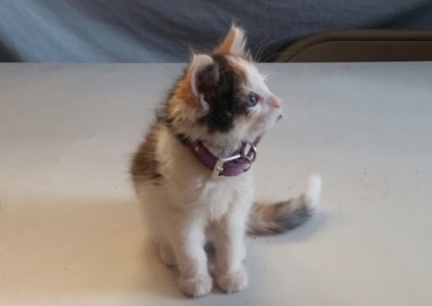
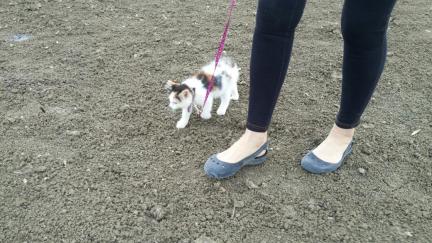
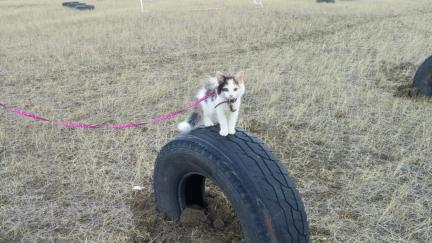
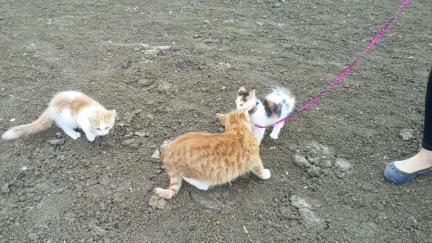
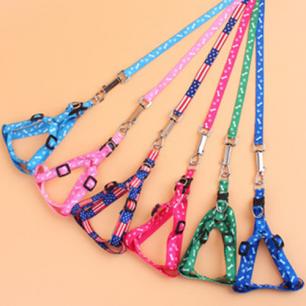
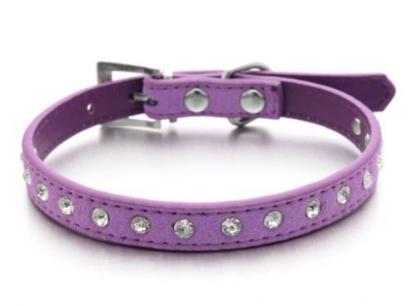
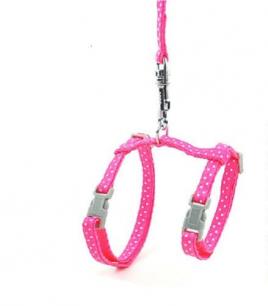
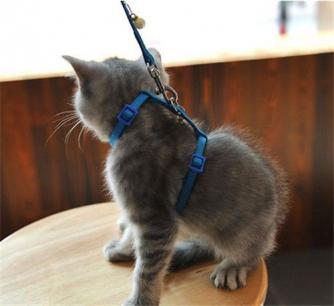
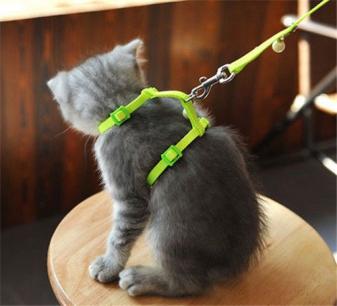
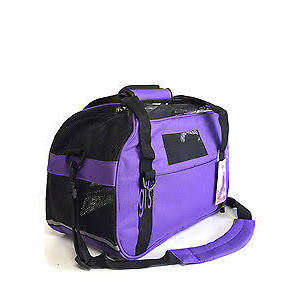
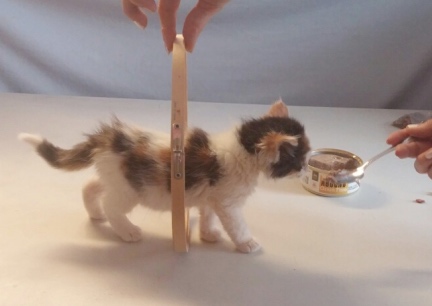
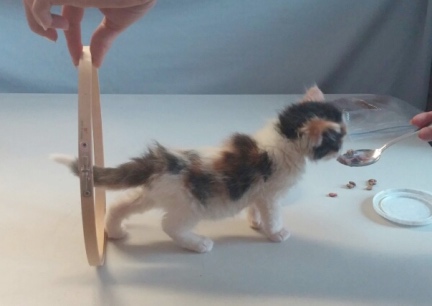
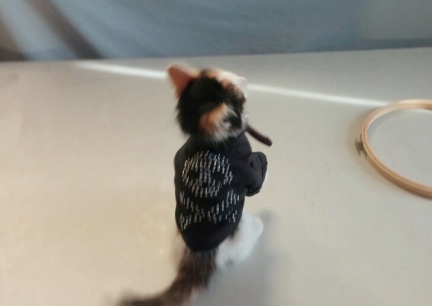
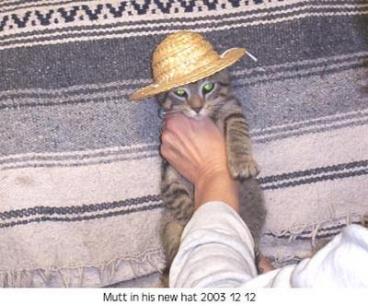
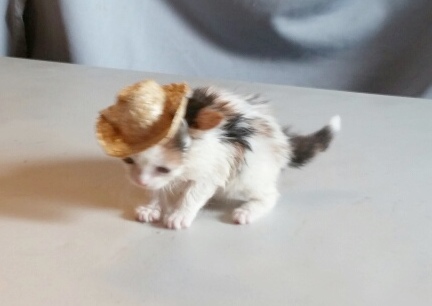
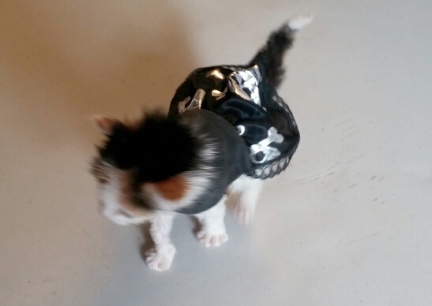

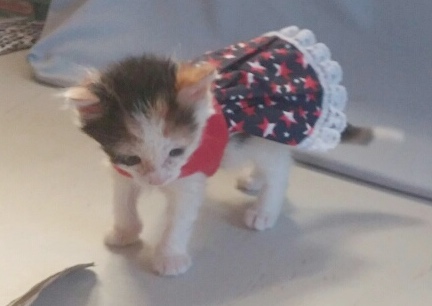
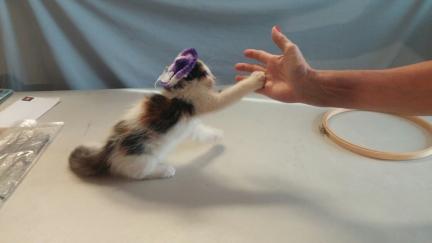
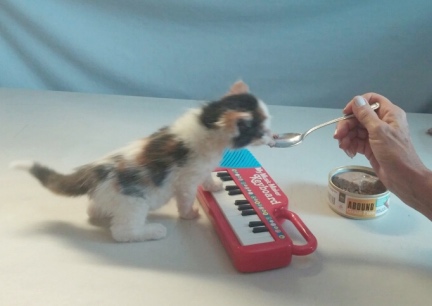
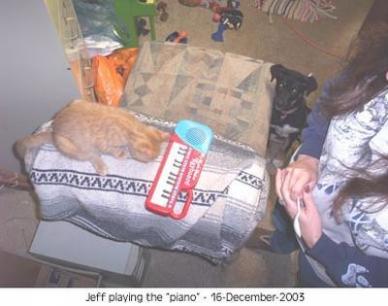
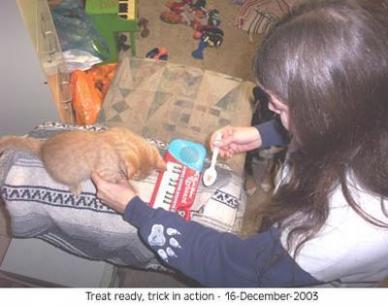
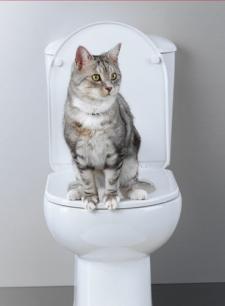
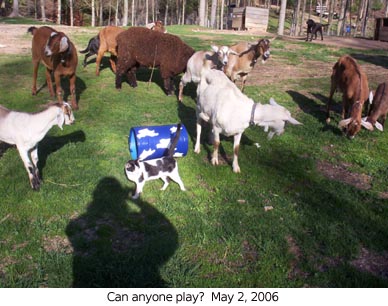
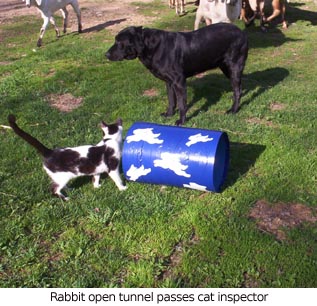

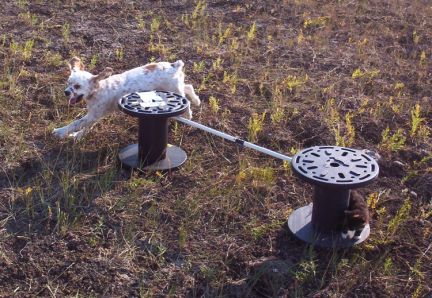
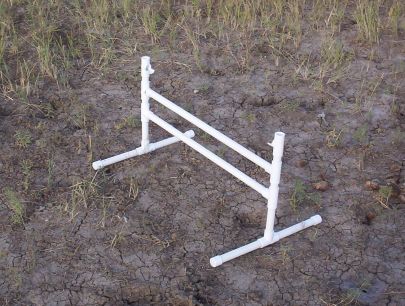

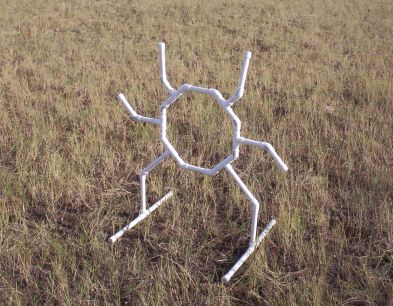
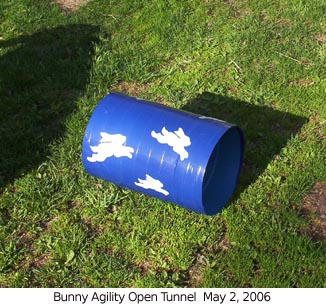
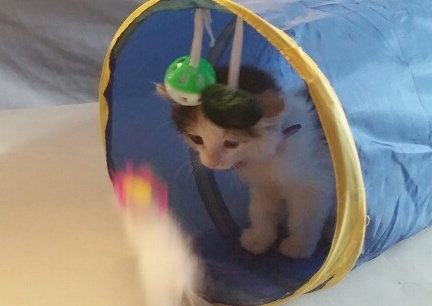
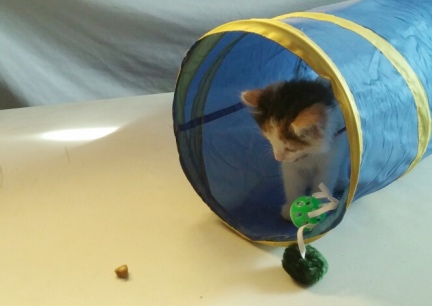
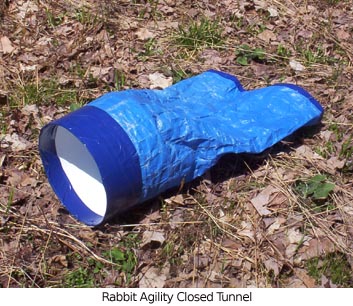
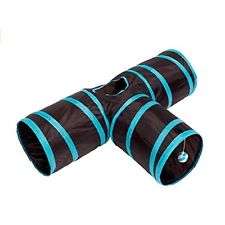
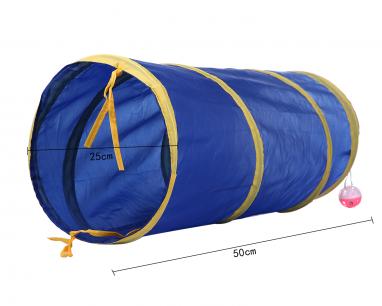
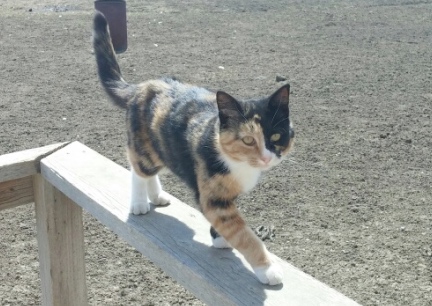
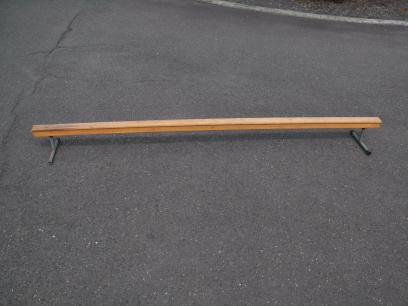
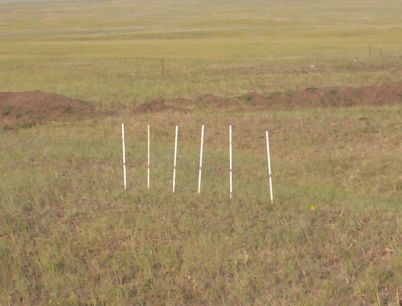
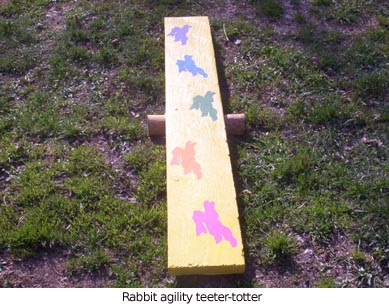
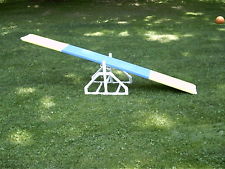
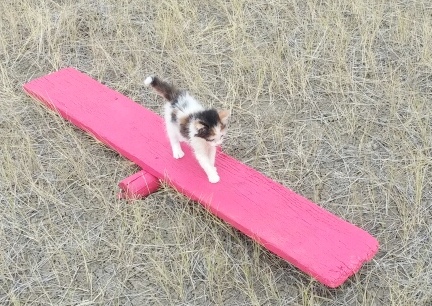
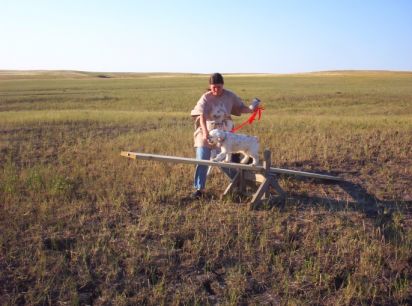
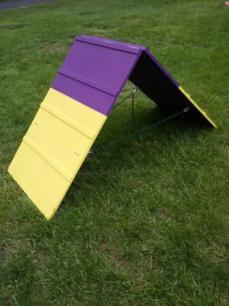
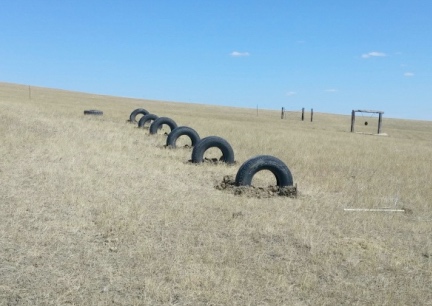
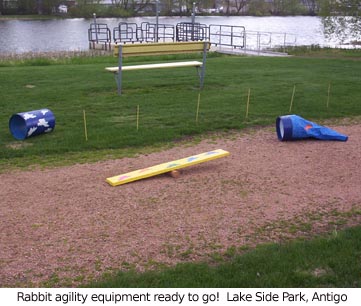

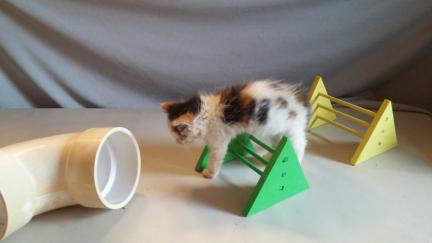
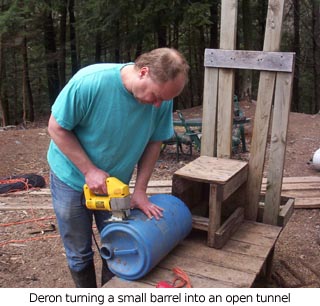
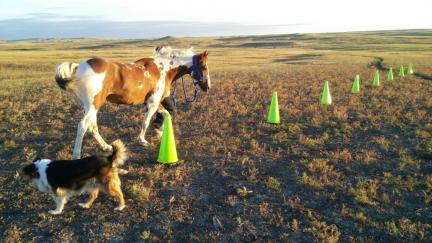
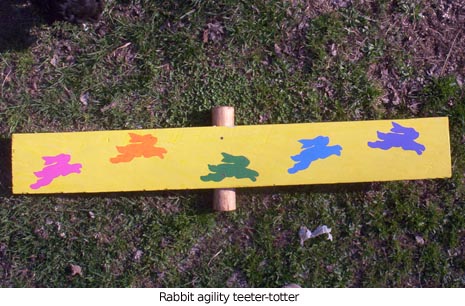

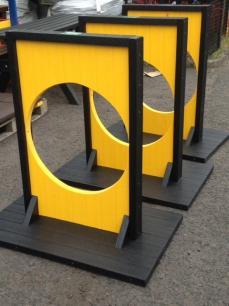
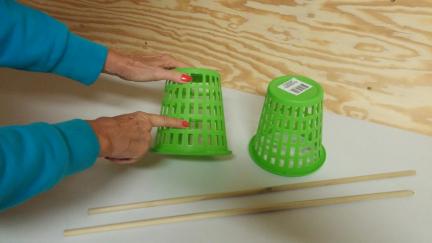
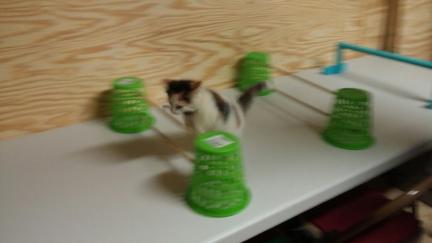
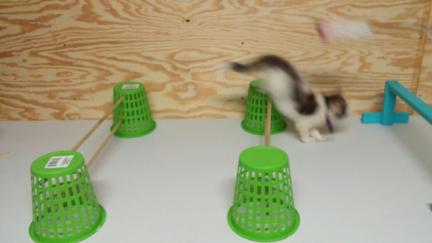
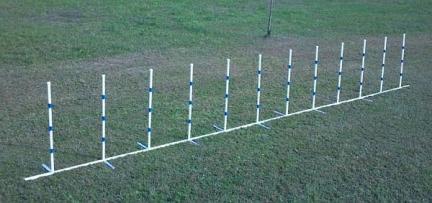

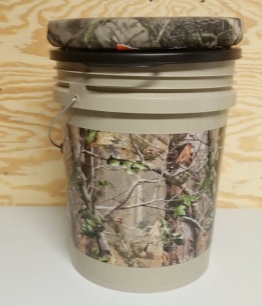
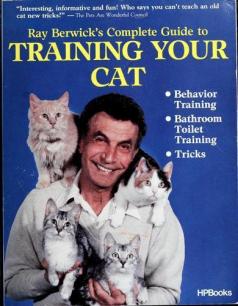
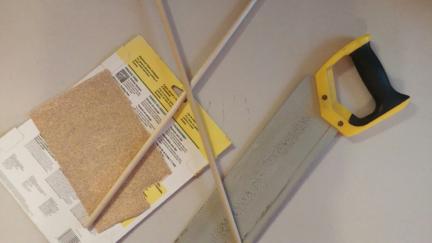
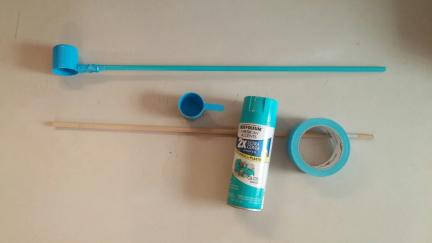
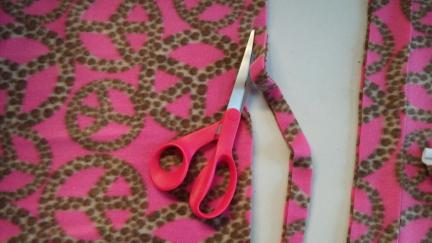
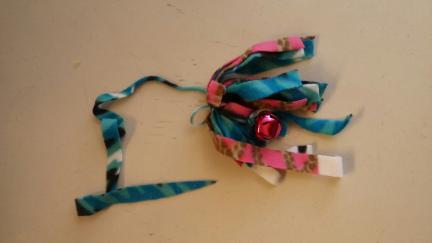
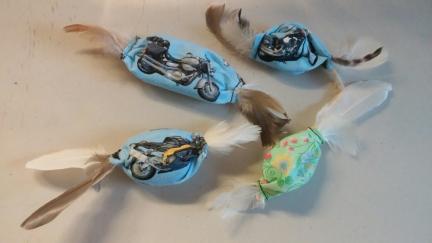
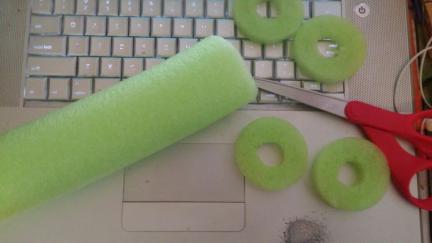
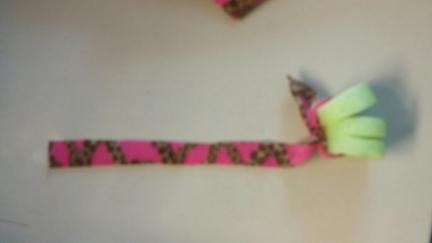
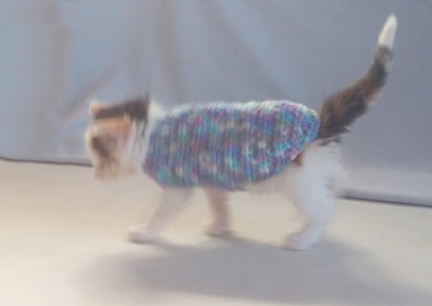
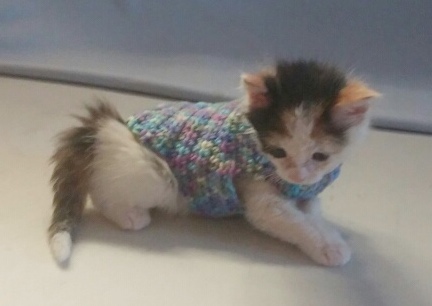
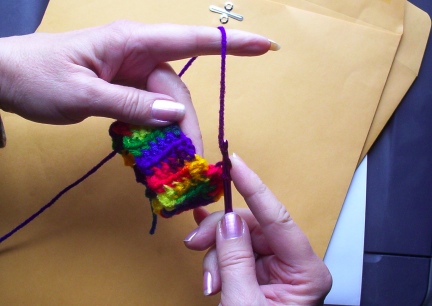
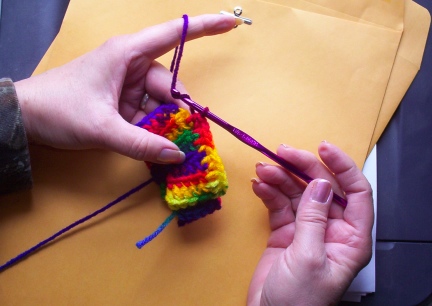
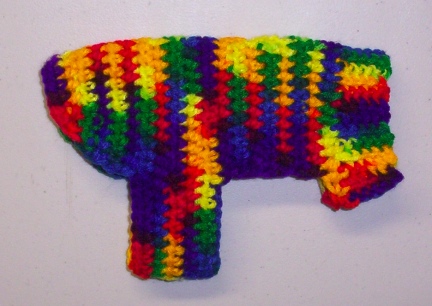
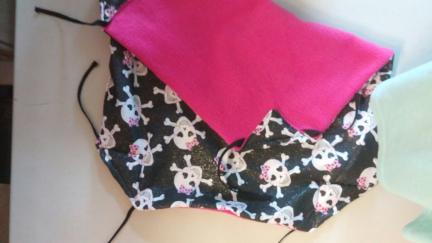
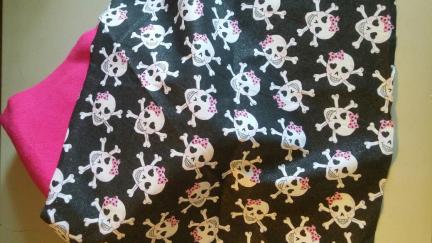

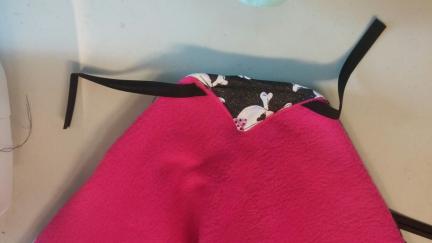
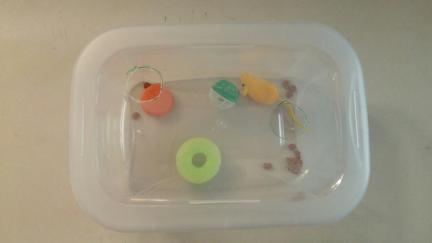
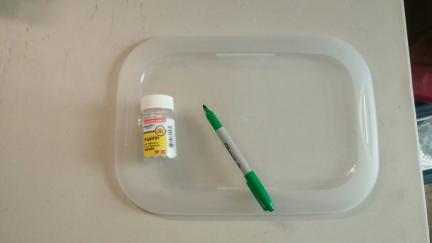
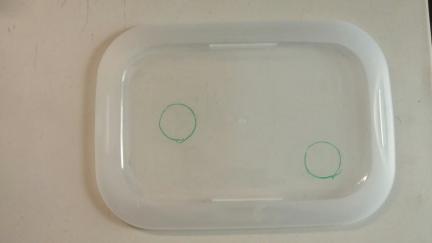
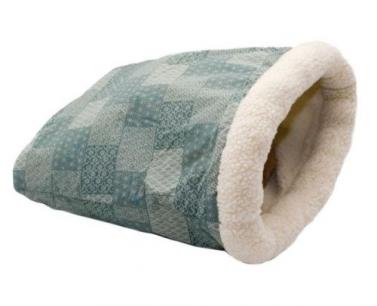
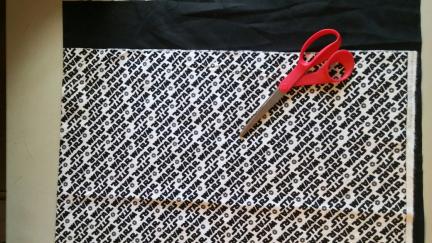
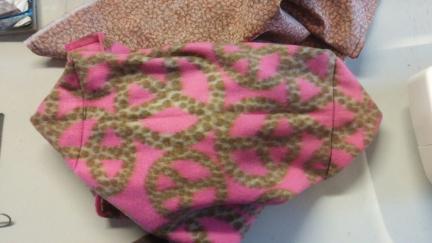
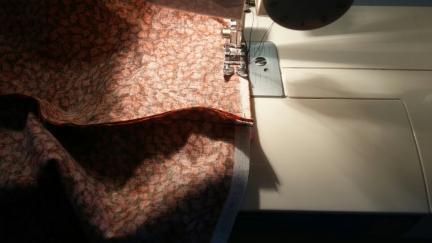
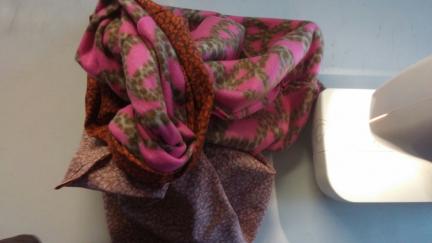
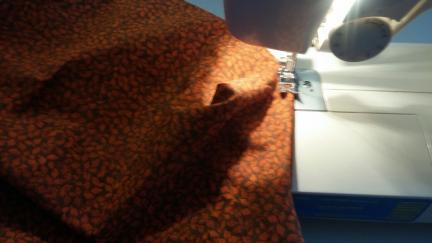
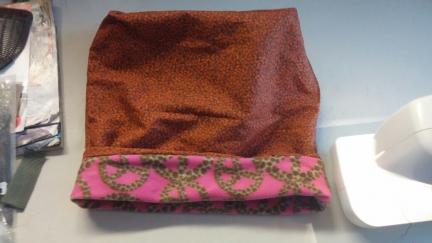
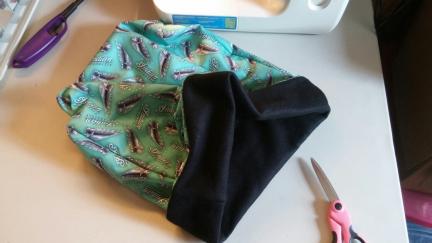
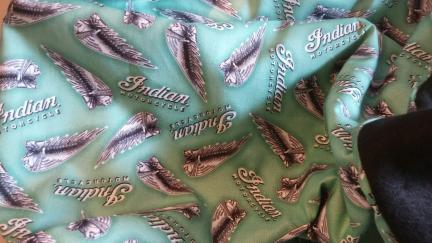

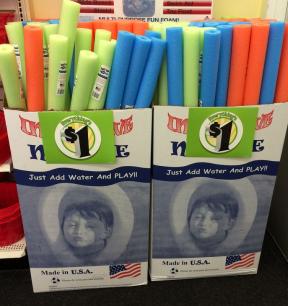

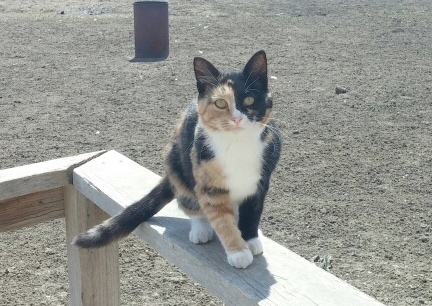
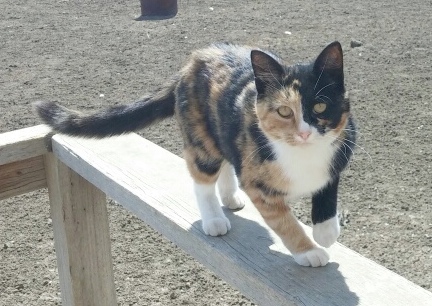
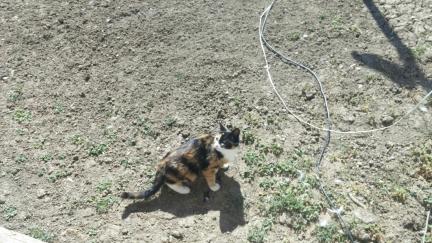
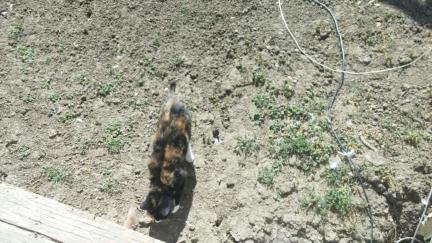
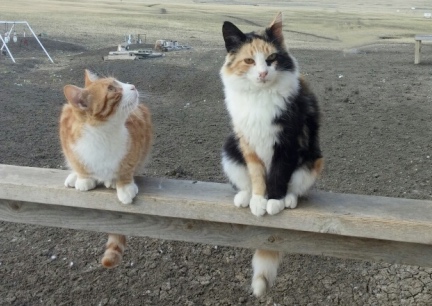
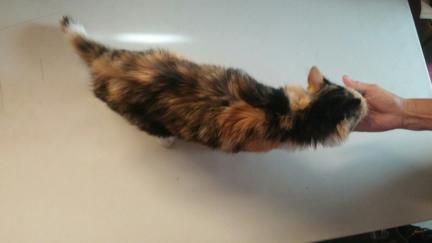
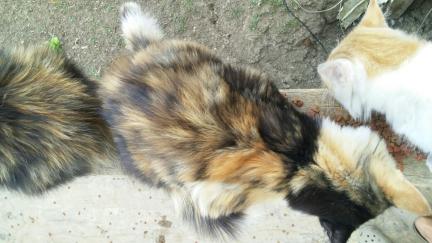
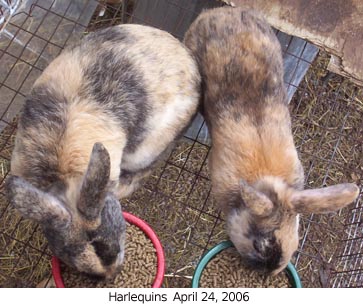
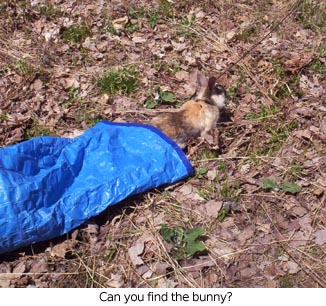

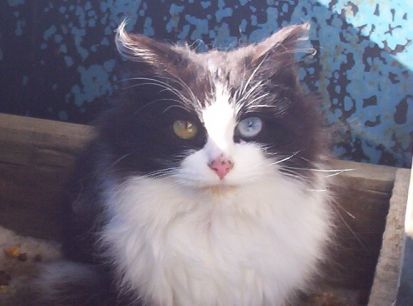
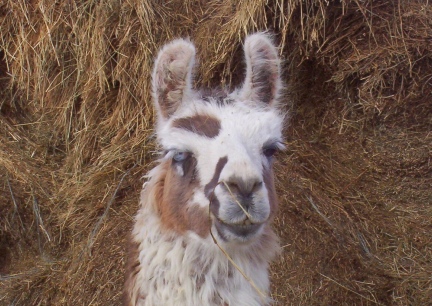
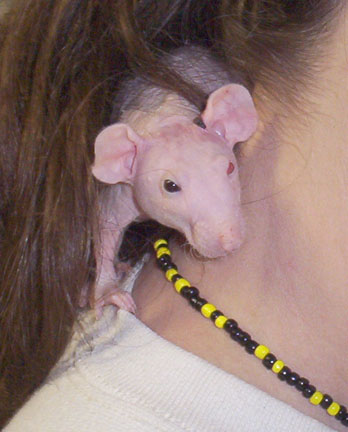

 In the high plains of South Dakota, USA